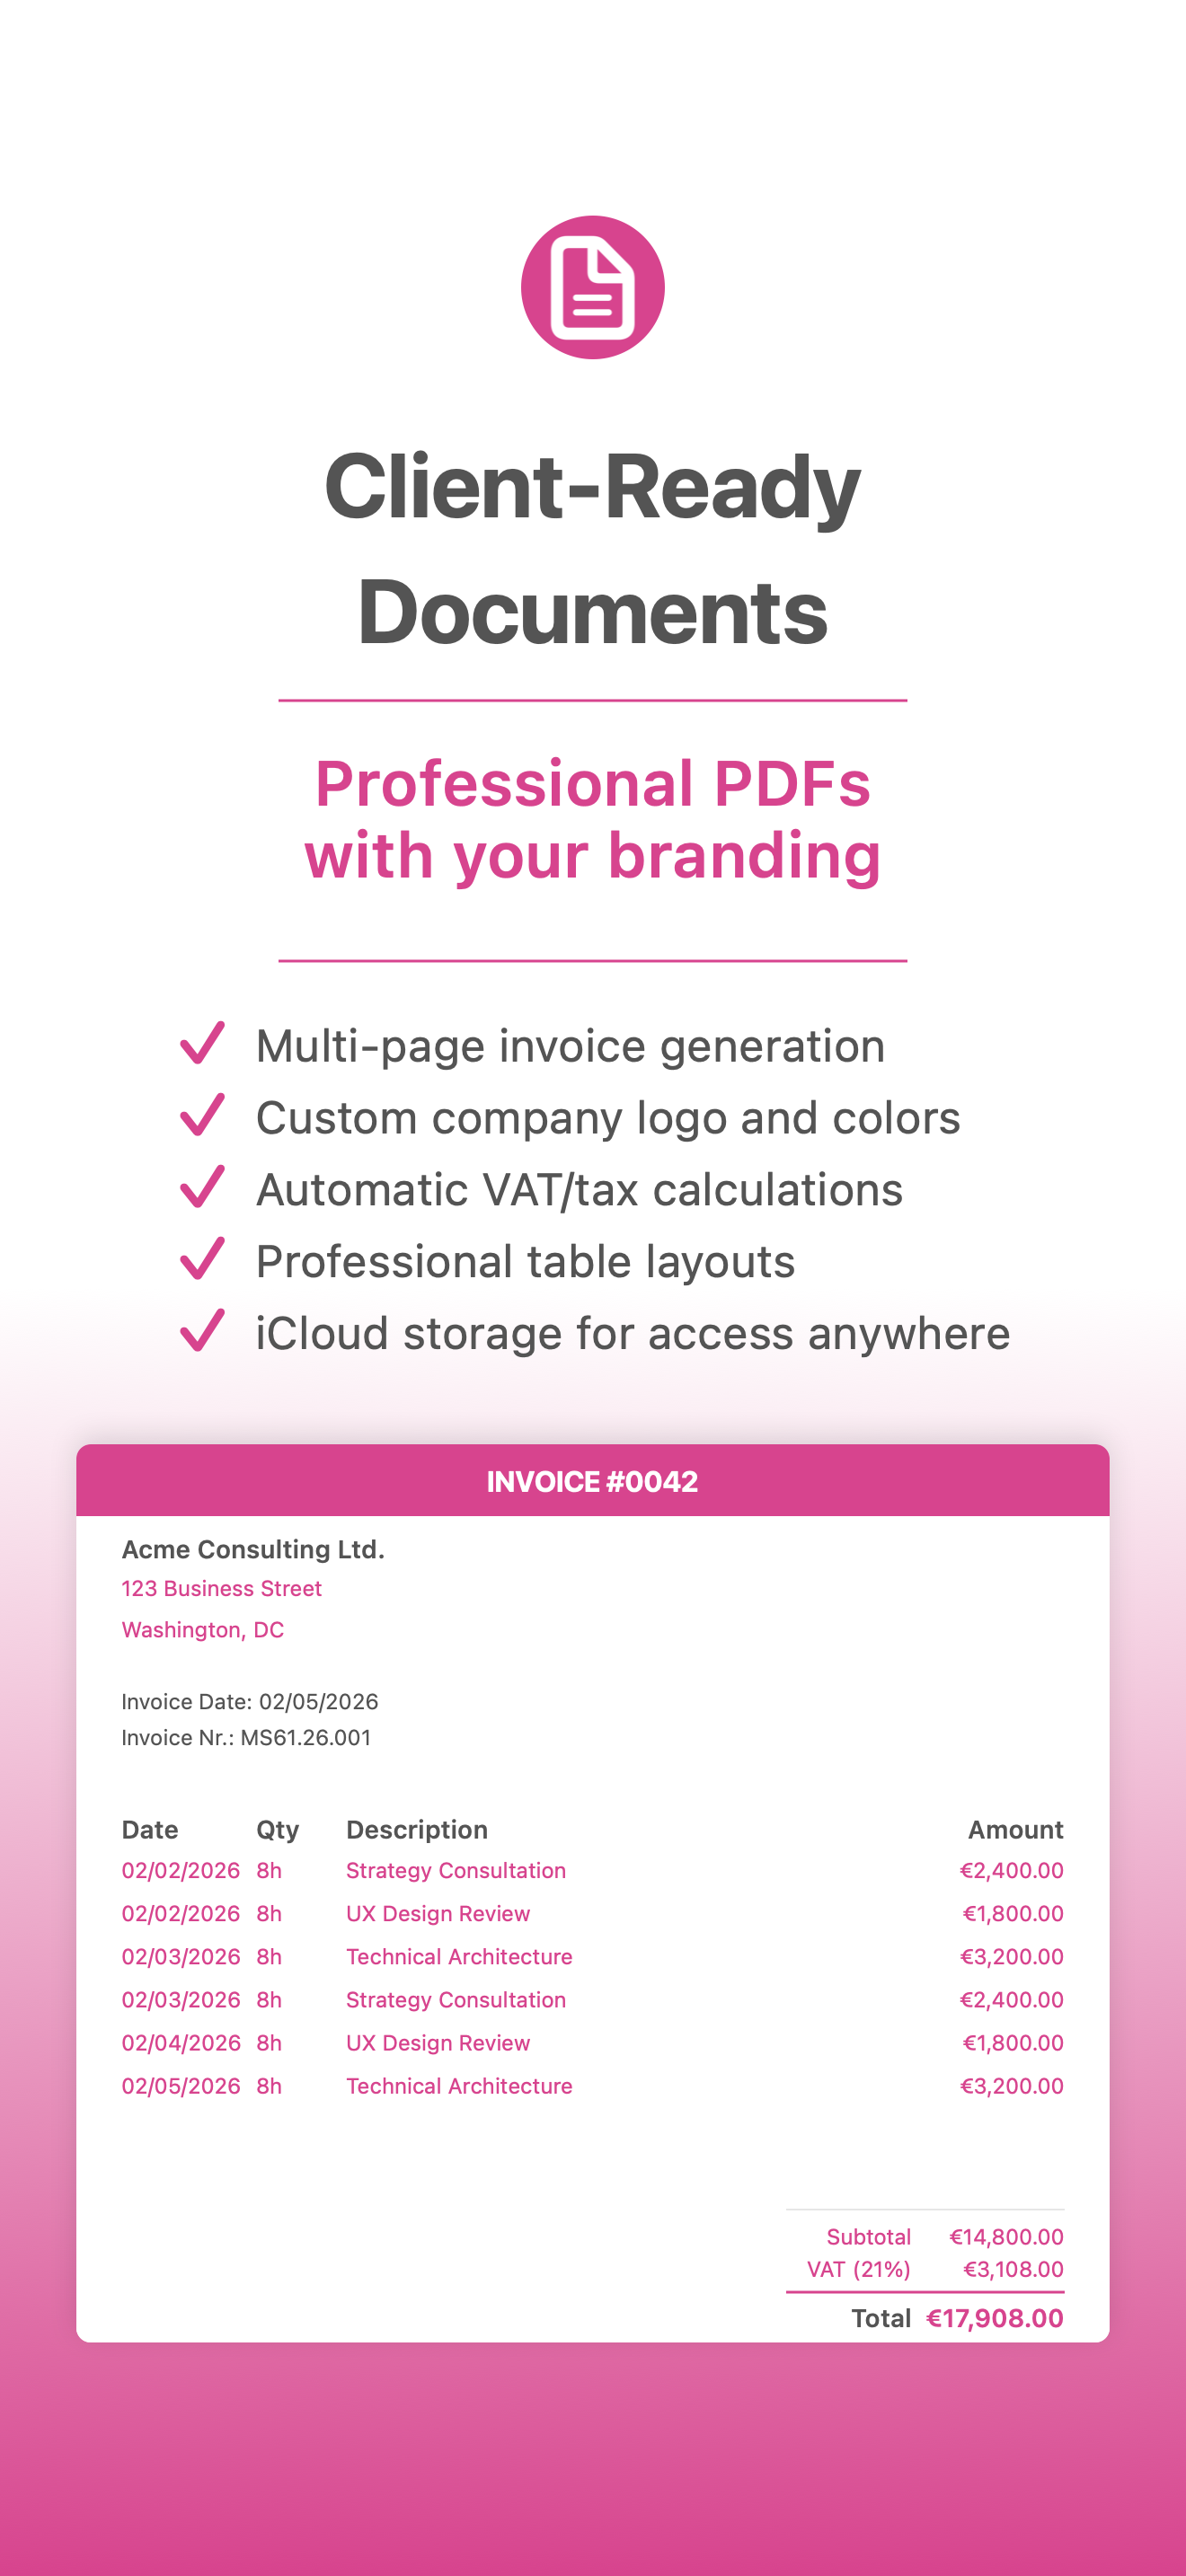
Consultancy Invoicing
Professional invoicing made simple
Walkthrough

Welcome
Get started with Consultancy Invoicing in just a few steps.

Set Up Your Business
Add your company details, logo, and payment information.
Create Your First Invoice
Build professional invoices with our intuitive editor.
Manage Clients
Organize your client database for quick invoice creation.

Send & Track
Share invoices and monitor payment status effortlessly.

Slide 6

Slide 7

Slide 8
Settings Overview


Settings Overview
Navigation Path: Main App > Settings tab (gear icon)
Purpose: The Settings tab is your central hub for configuring every aspect of Consultancy Invoicing. From security and company details to appearance, invoicing defaults, data management, and premium features, all customization options are accessible here.
How to Use
- Open the app and tap the Settings tab at the bottom of the screen.
- Scroll through the list to find the section you need.
- Tap on any item to view or modify its settings.
- Changes are saved automatically for most settings. For screens with a dedicated Save button (such as My Details or Number Generators), tap Save to apply your changes.
Sections at a Glance
The Settings screen is organized into the following sections, presented as a scrollable list:
| Section | Description |
|---|---|
| Security | Enable biometric authentication (Face ID / Touch ID) and manage your PIN |
| Company Details | Enter your personal and business information used on invoices |
| General | Customize tab colors, display mode (light/dark), and app language |
| Invoice Defaults | Set currency, default country, VAT, payment terms, and invoice numbering |
| Invoice Settings | Choose a table color and upload your company logo for PDF invoices |
| Project Contract Related Field Labels | Customize the five label fields used on project contracts |
| Task Defaults | Set default performer name, unit of measure, quantity, and unit price |
| Dummy Data | Create test data for contacts, clients, projects, and invoices (only visible when no data exists) |
| Delete Data | Remove all records of a specific type (hidden by default; toggle to reveal) |
| File Management | Configure directories for invoices, timesheets, exports, and imports; browse stored files |
| Export Data | Export your data in JSON or CSV format (hidden by default; toggle to reveal) |
| Import Data | Import data from JSON or CSV files (hidden by default; toggle to reveal) |
| App Information | View version and build number; replay the onboarding walkthrough |
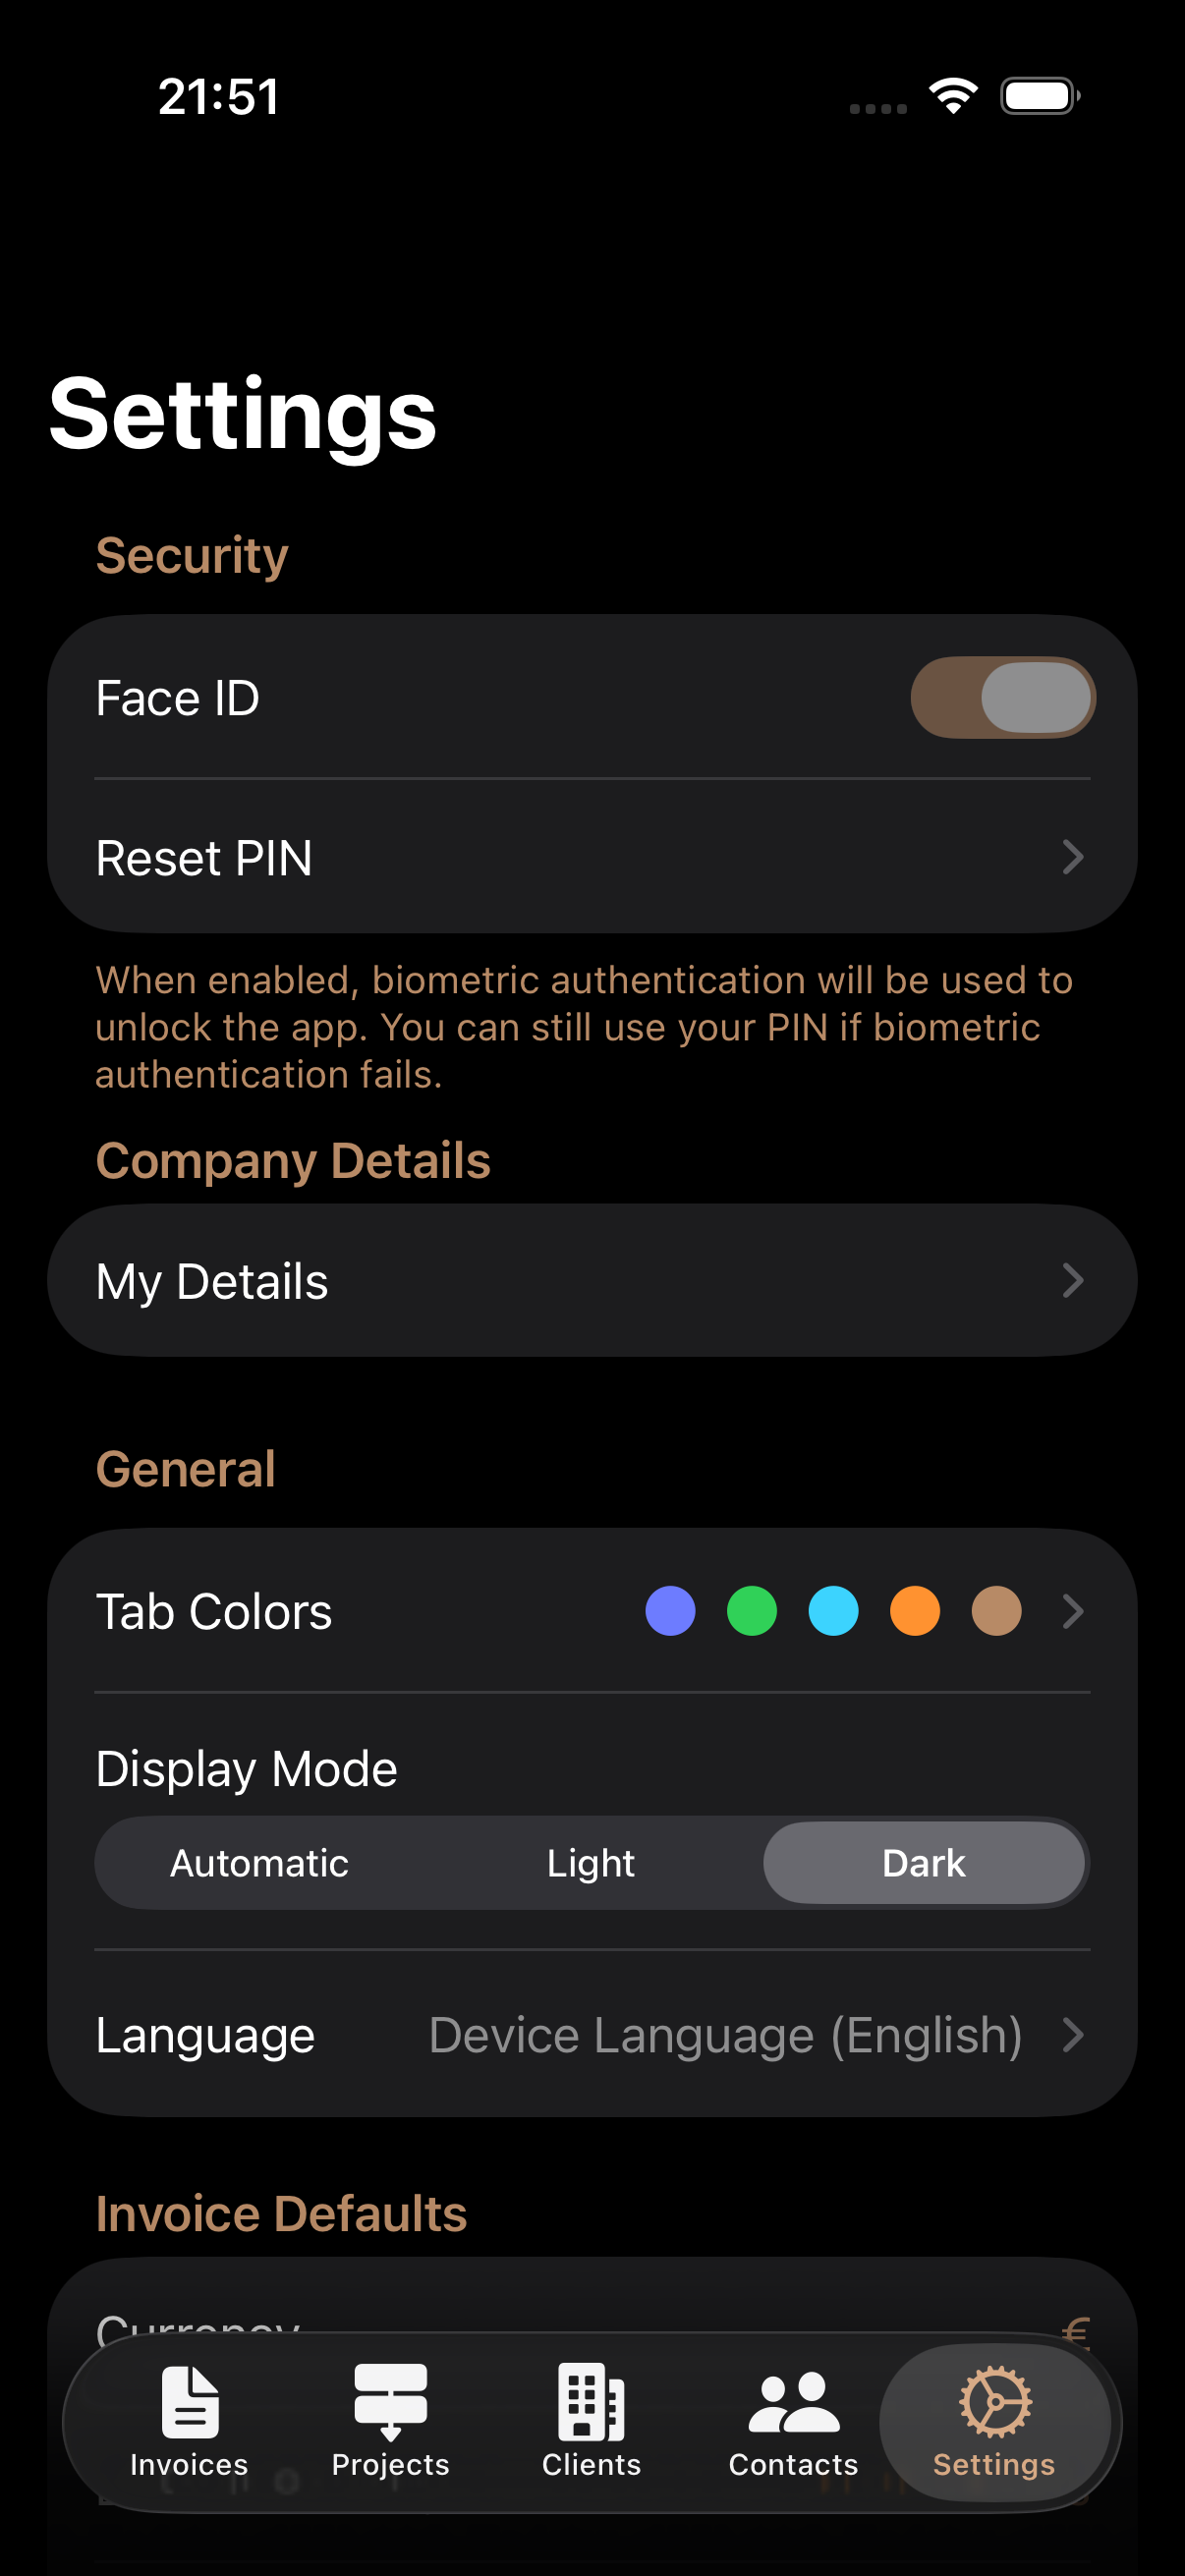
Screenshot 1 — Security, Company Details & General
Security
Purpose: Protect your business data with biometric authentication (Face ID or Touch ID) and a backup PIN code that you can reset at any time.
| Control | Type | Description |
|---|---|---|
| Face ID / Touch ID | Toggle | Enables or disables biometric authentication for unlocking the app. The label automatically shows "Face ID" or "Touch ID" depending on your device hardware. |
| Reset PIN | Navigation link | Opens the Reset PIN screen where you can change your backup PIN code. |
Reset PIN Screen
| Field | Type | Description | Constraints |
|---|---|---|---|
| Enter current PIN | Secure text field | Your existing PIN code. Must match the stored PIN. | Required; numeric input only |
| Enter new PIN | Secure text field | The new PIN you want to set. | Required; numeric input only; up to 5 digits |
| Confirm new PIN | Secure text field | Re-enter your new PIN for confirmation. | Must match the new PIN exactly |
Enabling Biometric Authentication
- Navigate to Settings > Security.
- Toggle Face ID (or Touch ID) to the on position.
- If biometric authentication is not available on your device, the toggle will be disabled.
- When enabled, the app will prompt for biometric authentication each time you open it.
- If biometric authentication fails, you can always fall back to your PIN.
Resetting Your PIN
- Navigate to Settings > Security.
- Tap Reset PIN.
- Enter your current PIN in the first field.
- Enter your new PIN in the second field.
- Confirm the new PIN by entering it again in the third field.
- The Save button appears in the top-right corner only when all fields are valid (correct current PIN and matching new PINs).
- Tap Save to apply the new PIN.
Tips: Your PIN is stored securely in the device Keychain, not in the app's regular data storage. If you forget your PIN, you will need to use biometric authentication to access the app. The PIN uses a numeric keypad for quick entry.
Company Details
The Company Details row links to the My Details screen (see the My Details guide).
General
| Control | Type | Description |
|---|---|---|
| Tab Colors | Navigation link | Opens the Tab Colors screen to customize accent colors for each tab (see the Tab Colors guide). |
| Display Mode | Segmented picker | Choose between Automatic (follows system setting), Light, or Dark mode. Applied immediately. |
| Language | Navigation link | Opens the Language selection screen. The currently selected language is shown next to the link. |
Changing the App Language
- Tap Language in the General section.
- Tap your preferred language from the list: Device Default, English, Dutch, German, French, Italian, Spanish, or Portuguese.
- Choosing Device Default uses whatever language your iPhone or iPad is set to (if supported; otherwise defaults to English).
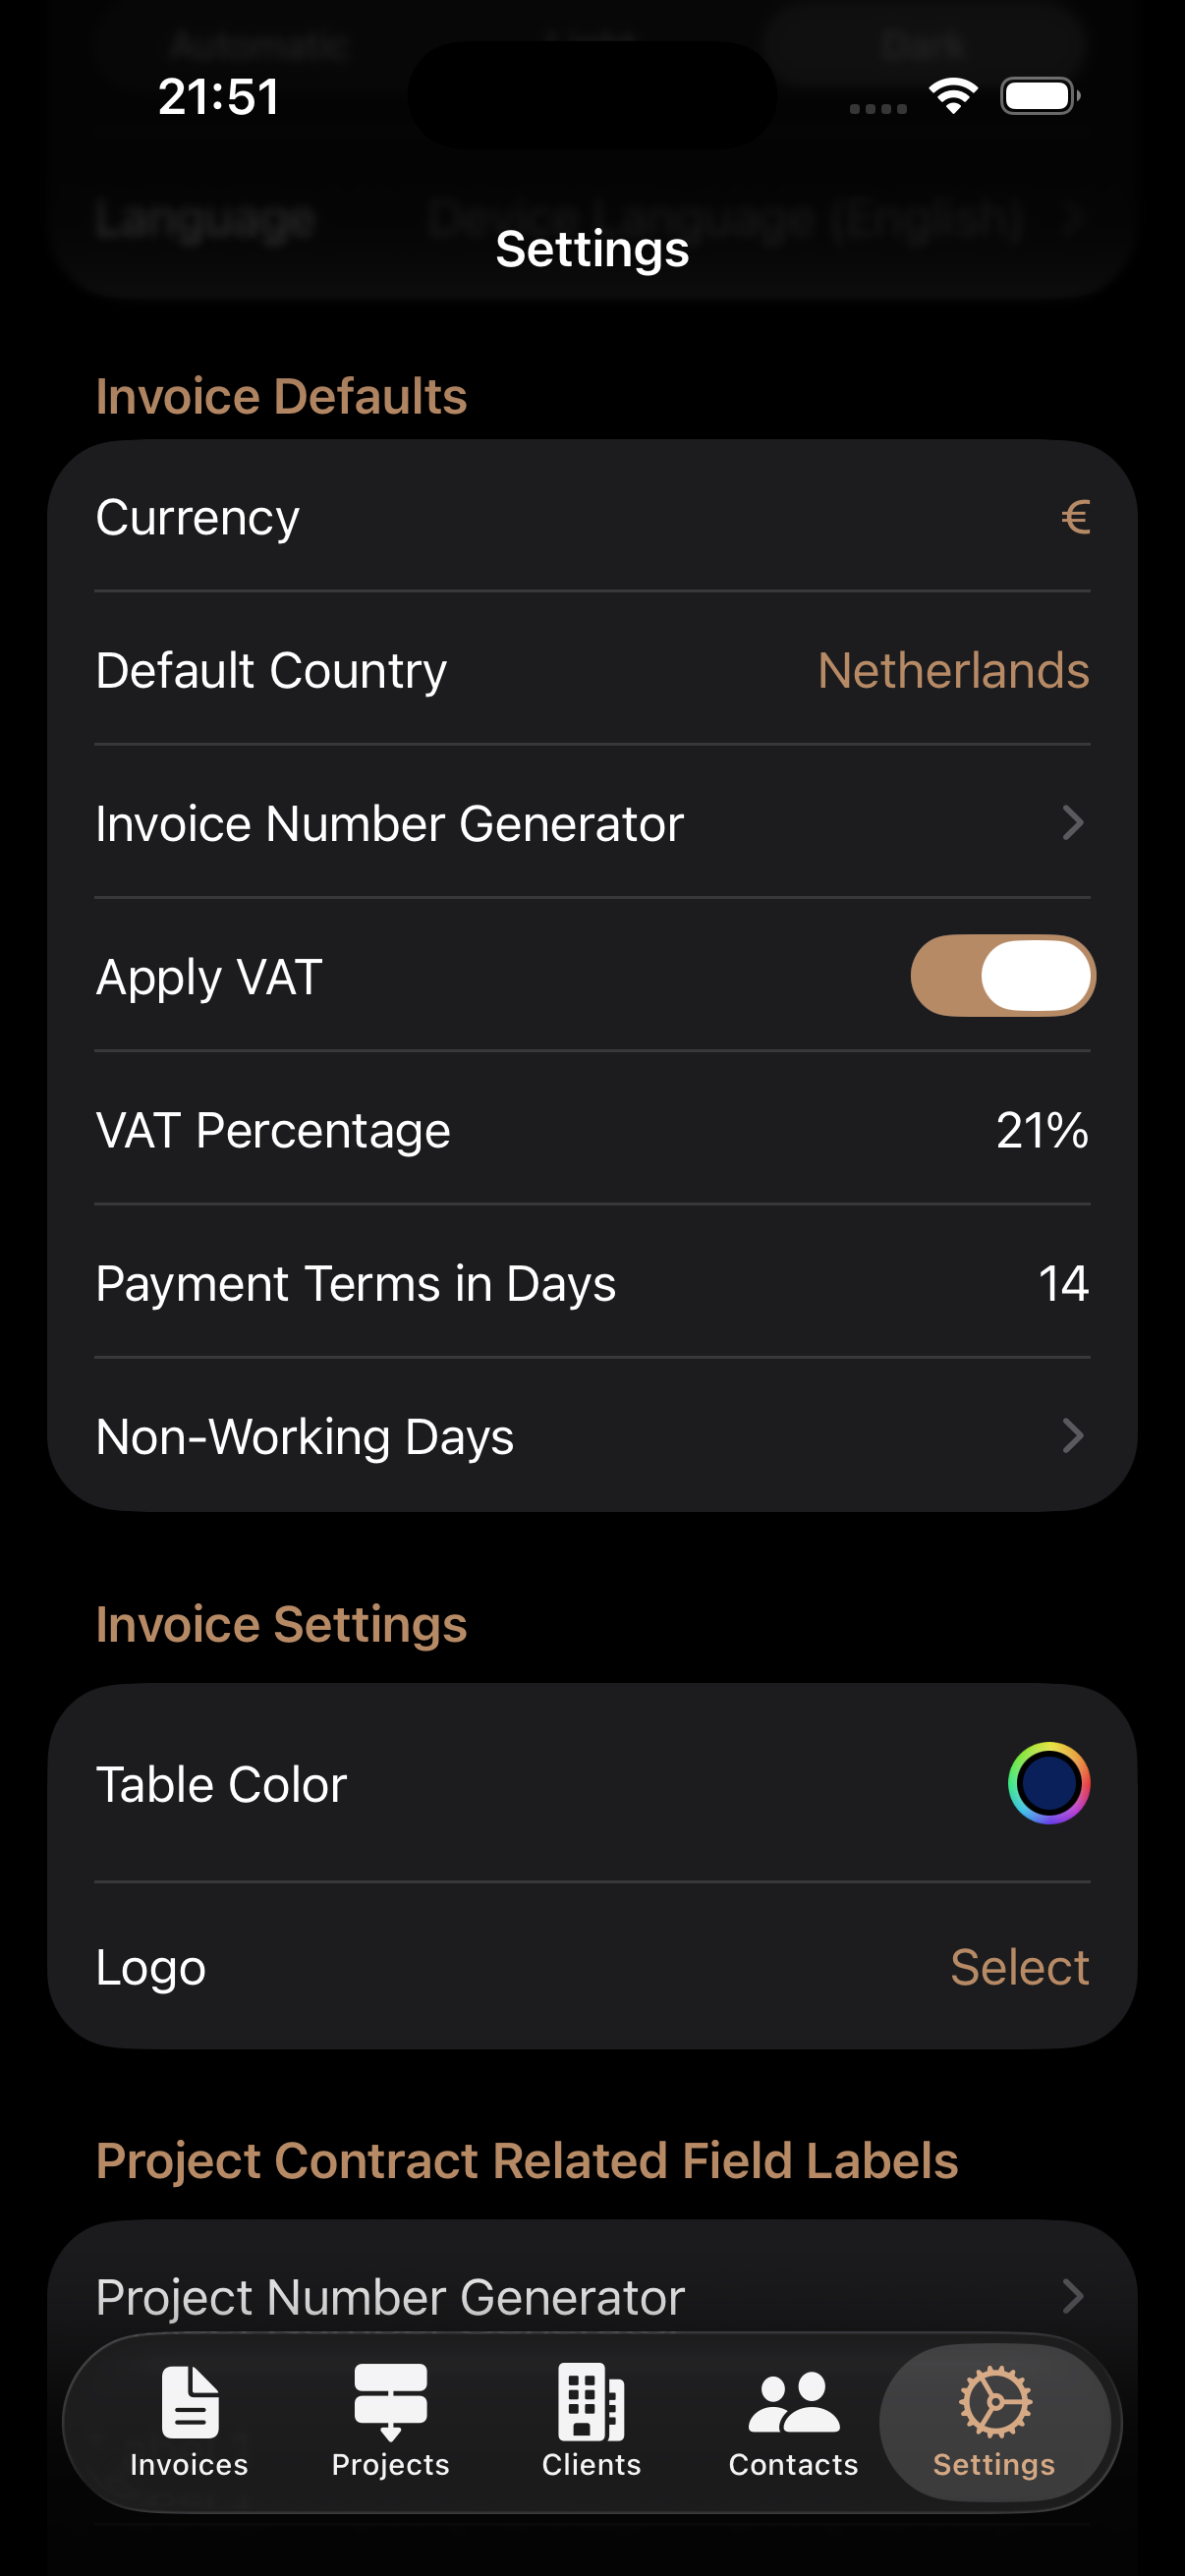
Screenshot 2 — Invoice Defaults & Invoice Settings
Invoice Defaults
Purpose: Set default values for invoice-related fields such as currency, country, VAT rate, and payment terms. These defaults are applied automatically when creating new invoices, saving you time.
| Control | Type | Description | Constraints |
|---|---|---|---|
| Currency | Button / Picker | Opens a searchable list of world currencies. The current currency symbol is displayed. | Defaults to EUR |
| Default Country | Button / Picker | Opens a searchable list of countries. Sets the default country for new client addresses. | Defaults to your device region |
| Invoice Number Generator | Navigation link | Opens the Invoice Number Generator screen (see the Invoice Number Generator guide). | -- |
| Apply VAT | Toggle | Enables or disables VAT on invoices. When enabled, the VAT Percentage field appears. | On/Off |
| VAT Percentage | Numeric field | The default VAT rate applied to new invoices (shown as a percentage). Only visible when Apply VAT is enabled. | Decimal input; percentage format |
| Payment Terms in Days | Numeric field | The default number of days until an invoice is due. | Whole number; numeric keypad |
| Non-Working Days | Navigation link | Opens the Non-Working Days management screen (see the Non-Working Days guide). | -- |
Setting the Currency
- Tap the currency symbol next to Currency.
- A searchable list of world currencies opens.
- Search by currency code (e.g., "USD") or name (e.g., "Dollar").
- Tap your preferred currency. A checkmark indicates the current selection.
- The change is saved automatically.
Configuring VAT
- Toggle Apply VAT on or off.
- When on, enter the VAT Percentage (e.g., 21 for 21%).
- This rate will be applied as the default on new invoices.
Setting Payment Terms
- Tap the Payment Terms in Days field.
- Enter the number of days (e.g., 30).
- This value will be used to calculate the due date on new invoices.
Tips: All changes in this section are saved automatically. The currency picker supports over 150 world currencies. Setting a default VAT percentage does not prevent you from changing it on individual invoices. Payment terms are expressed in calendar days.
Invoice Settings
Purpose: Configure the visual styling of your generated PDF invoices by selecting a table color and uploading your company logo.
| Control | Type | Description |
|---|---|---|
| Table Color | Color picker | Sets the color used for table headers, borders, and accents in generated PDF invoices and timesheets. |
| Logo | Photo picker | Upload your company logo to appear on PDF invoices and timesheets. |
Logo Controls
| Control | Description |
|---|---|
| Select | Shown when no logo is set. Opens the photo library to choose an image. |
| Change | Shown when a logo is already set. Opens the photo library to replace the current logo. |
| Remove | Shown when a logo is already set. Removes the current logo. Displayed in red to indicate a destructive action. |
Tips: The logo is stored as a JPEG image with 80% compression quality. Choose a table color that complements your logo. A logo with a transparent or white background typically works best on PDF invoices.
Screenshot 3 — Contract Labels & Task Defaults
Project Contract Related Field Labels
Purpose: Customize the five contract field labels used in project details and configure the project number generator.
| Field | Type | Description | Default |
|---|---|---|---|
| Label 1 | Text field | Custom label for the first contract field. | "Label 1" |
| Label 2 | Text field | Custom label for the second contract field. | "Label 2" |
| Label 3 | Text field | Custom label for the third contract field. | "Label 3" |
| Label 4 | Text field | Custom label for the fourth contract field. | "Label 4" |
| Label 5 | Text field | Custom label for the fifth contract field. | "Label 5" |
| Project Number Generator | Navigation link | Opens the Project Number Generator screen. | -- |
Customizing Contract Labels
- Tap any label field and type your desired label name (e.g., "Purchase Order", "Contract Reference", "Start Date").
- Each field has a clear button (X) to quickly empty it.
- Changes are saved automatically as you type.
- These labels will appear as field names in your project contract details.
Project Number Generator
Configure the automatic numbering format for new projects. Define a prefix, starting counter, suffix, and the number of leading zeros.
| Field | Type | Description | Constraints |
|---|---|---|---|
| Prefix | Text field | A text string placed before the counter number (e.g., "PRJ-"). | Optional |
| Counter | Text field (numeric) | The current counter value. Increments automatically each time a new project is created. | Numeric only; required |
| Suffix | Text field | A text string placed after the counter number. | Optional |
| Leading Zeros | Stepper | Controls how many leading zeros pad the counter number. | Range: 0 to 5 |
| Preview | Display | Shows a live preview of the generated project number. | Read-only |
| Prefix | Counter | Suffix | Leading Zeros | Result |
|---|---|---|---|---|
| PRJ- | 1 | 3 | PRJ-0001 | |
| P- | 25 | 2 | P-025 | |
| 100 | 0 | 100 | ||
| 2026/ | 3 | -C | 2 | 2026/003-C |
Tips: Contract labels let you adapt the app to your specific business terminology (e.g., "PO Number", "Framework Agreement", "Budget Code"). The project number generator works identically to the invoice number generator but maintains its own independent counter.
Task Defaults
Purpose: Set default values for new tasks including the performer name, unit of measure, quantity, and unit price.
| Field | Type | Description | Constraints |
|---|---|---|---|
| Default Performer | Text field | The name pre-filled as the performer on new tasks. Typically your own name. | Optional; word capitalization |
| Default Unit | Picker | The default unit of measure for new tasks (e.g., Hours, Days, Pieces). | Selection from available units |
| Default Quantity | Numeric field | The default quantity pre-filled on new tasks. | Decimal input |
| Default Unit Price | Currency field | The default unit price pre-filled on new tasks. Displayed in the selected currency format. | Decimal input; currency format |
Tips: Task defaults save time when you frequently create similar tasks. You can always override these values on individual tasks. The Default Unit Price is formatted according to your selected currency.
Screenshot 4 — Dummy Data, Delete Data & File Management
Dummy Data (Test Data)
Purpose: Quickly create sample test data for development, testing, or demonstration purposes.
| Control | Type | Description | Visibility |
|---|---|---|---|
| Create test Contacts | Button | Creates 5 sample contact records. | Only visible when no contacts exist |
| Create test Clients | Button | Creates 5 localized sample client records. | Only visible when no clients exist |
| Create test Projects | Button | Creates 1 to 5 random projects per client, each with 1 to 5 random tasks. | Only visible when no projects exist |
| Create test Invoices | Button | Creates 1 to 10 random invoices per project, each with 1 to 30 random invoice lines. | Only visible when no invoices exist |
How to Use
- Navigate to Settings and scroll to the Dummy Data section.
- The section only appears when one or more entity types have no records.
- Create data in the recommended order: Contacts → Clients → Projects → Invoices.
- Each button shows a confirmation dialog before creating data.
- Once data exists for an entity type, its button disappears. When all entity types have records, the entire section is hidden.
Tips: Follow the creation order — clients require contacts, and projects require clients. This section is designed for evaluating the app. Once you start entering real business data, it automatically disappears.
Delete Data
Purpose: Permanently delete all records of a specific entity type. Use with extreme caution as deletions cannot be undone.
| Control | Type | Description | Visibility |
|---|---|---|---|
| Section toggle | Toggle (in section header) | Show or hide the delete buttons. Hidden by default for safety. | Always visible when any records exist |
| Delete All Clients (N) | Button (destructive) | Deletes all clients and their related projects, tasks, timesheets, invoices, and contracts. | Only visible when clients exist |
| Delete All Projects (N) | Button (destructive) | Deletes all projects and their related tasks, timesheets, invoices, and contracts. | Only visible when projects exist |
| Delete All Invoices (N) | Button (destructive) | Deletes all invoices and their line items. | Only visible when invoices exist |
| Delete All Contacts (N) | Button (destructive) | Deletes all contact records. | Only visible when contacts exist |
| Delete Settings | Button (destructive) | Resets all settings to their default values. | Always visible when section is toggled open |
Cascade Deletion
| Deleting | Also Deletes |
|---|---|
| All Clients | All projects, contracts, tasks, timesheets, timesheet lines, invoices, and invoice lines belonging to those clients |
| All Projects | All contracts, tasks, timesheets, timesheet lines, invoices, and invoice lines belonging to those projects |
| All Invoices | All invoice line items |
| All Contacts | Contact records only (no cascade) |
| Settings | Resets all settings to defaults (does not delete business data) |
Tips: The Delete Data section is hidden by default to prevent accidental deletions. Consider exporting your data before deleting it. Deleting clients is the most comprehensive deletion since it cascades through all related entities.
File Management
Purpose: Configure the directories where the app saves generated PDFs and data files, and browse, rename, or delete files stored in those directories.
| Control | Type | Description |
|---|---|---|
| Invoice Directory | Button | Tap to select the folder where generated invoice PDFs will be saved. |
| Timesheet Directory | Button | Tap to select the folder where generated timesheet PDFs will be saved. |
| Export Directory | Button | Tap to select the folder where exported data files will be saved. |
| Import Directory | Button | Tap to select the folder where the app looks for data files to import. |
| Browse Files | Navigation link | Opens the File Management browser to view and manage files. |
File Browser
| Control | Type | Description |
|---|---|---|
| Tab selector | Segmented picker | Switch between Invoices, Timesheets, Exports, and Imports tabs. |
| File list | List | Shows all files in the selected directory with file name, path, size, and date. |
| Rename (swipe left, orange) | Action | Opens a dialog to enter a new name for the file (max 200 characters). |
| Delete (swipe left, red) | Action | Deletes the file after confirmation. |
Setting Up Directories
- In the File Management section, tap any directory row (e.g., "Invoice Directory").
- The system folder picker opens. Navigate to your desired folder (e.g., in iCloud Drive or On My iPhone).
- Tap Open to select the folder.
- Repeat for each directory type you want to configure.
Tips: Files are organized by client and project within the selected directories. You can use any accessible folder, including iCloud Drive folders, for seamless synchronization across devices.
Screenshot 5 — Export Data, Import Data & App Information
Export Data
Purpose: Export your business data in JSON or CSV format for backup, migration, or analysis.
| Control | Type | Description |
|---|---|---|
| Section toggle | Toggle (in section header) | Show or hide the export data controls. Hidden by default. |
| File type | Segmented picker | Choose between JSON and CSV export format. |
| Export | Segmented picker | Choose between All (export everything) or Single (export individual entity types). |
When All is selected, a single Export All Data link appears. When Single is selected, individual links appear for: Client data, Contact data, Invoice data, Project data, Task data, Timesheet data, Settings, and My Details.
Exporting Data
- Toggle the Export Data section open using the switch in the section header.
- Select JSON or CSV as the file type.
- Choose All or Single for the scope.
- Tap the export link to create the file.
- Use the system share sheet to save, send, or share the file, or tap Save to Export Directory if configured.
Tips: Export Data is a Premium feature. JSON format preserves all data relationships and is recommended for backup. CSV format is useful for spreadsheet applications. Exported files are not encrypted — share through secure channels. Temporary export files are cleaned up automatically.
Import Data
Purpose: Import business data from JSON or CSV files to populate or restore your app data.
| Control | Type | Description |
|---|---|---|
| Section toggle | Toggle (in section header) | Show or hide the import data controls. Hidden by default. |
| File type | Segmented picker | Choose between JSON and CSV import format. |
| Import | Segmented picker | Choose between All (from a single JSON file) or Single (individual entity types). |
Import Results
| Field | Description |
|---|---|
| Total Records | The total number of records found in the file. |
| Imported | The number of records successfully imported. |
| Skipped (Duplicates) | Records skipped because they already exist. |
| Errors | Records that could not be imported due to errors. |
| Success Rate | Percentage of records successfully imported. |
Importing Data
- Toggle the Import Data section open.
- Select the file type and scope.
- Tap the import link, then select a file from the import directory or browse for one.
- Review the import results.
Using Templates
- On the import screen for a single entity type (JSON format), tap Create Template.
- Save the template, fill in your data following the provided structure.
- Import the completed file back into the app.
Tips: All-data import only supports JSON format. Duplicate records are automatically detected and skipped. The import results screen color-codes outcomes: green for success, orange for warnings, red for errors.
App Information
Purpose: View the current app version and build number, and replay the onboarding walkthrough.
| Control | Type | Description |
|---|---|---|
| Show Walkthrough | Button | Replays the full-screen onboarding walkthrough that was shown when you first opened the app. |
| Version | Display (read-only) | Shows the current app version number. |
| Build | Display (read-only) | Shows the current build number. |
Tips: The version and build numbers are useful when reporting issues. The walkthrough is a great way to discover features you might have missed. Version numbers follow semantic versioning: major.minor.patch.
Premium Subscription
The Premium purchase screen appears when you attempt to use a premium-gated feature (such as exporting an invoice as PDF or sharing data).
Premium Features
| Feature | Description |
|---|---|
| Export Invoices as PDF | Generate professional PDF invoices with your logo and company details. |
| Export Timesheets as PDF | Generate PDF timesheets for client billing and record-keeping. |
| Send PDFs via Email | Send generated PDFs directly to clients via the in-app email composer. |
| Share PDFs | Share generated PDFs using the system share sheet (AirDrop, Messages, etc.). |
| Export Data (CSV/JSON) | Export your business data in CSV or JSON format for backup or analysis. |
| Auto-save PDFs to Directory | Automatically save generated PDFs to your configured directories. |
Controls
| Control | Type | Description |
|---|---|---|
| Subscribe / Start Free Trial | Button | Initiates the subscription purchase through the App Store. |
| Restore Purchases | Button | Restores a previously purchased subscription. |
| Manage Subscription | Button | Opens subscription management options (only visible for active subscribers). |
| Terms of Use | Link | Opens the Terms of Use in your browser. |
| Privacy Policy | Link | Opens the Privacy Policy in your browser. |
Subscription Details
- The subscription renews automatically unless cancelled at least 24 hours before the end of the current period.
- Payment is processed through Apple's App Store. The app never handles your payment information directly.
- A subscription is shared across all your devices signed in with the same Apple ID.
- You can cancel your subscription at any time through your Apple ID settings (Settings > Apple ID > Subscriptions).
General Tips
- Settings that have toggle switches for section visibility (Export Data, Import Data, Delete Data) help keep the screen clean. Turn them on only when you need them.
- All settings are synchronized via iCloud, so changes you make on one device will appear on your other devices.
- Use the Show Walkthrough option in the App Information section to replay the app introduction at any time.
- The Dummy Data section only appears when the corresponding entity type has no records.
My Details
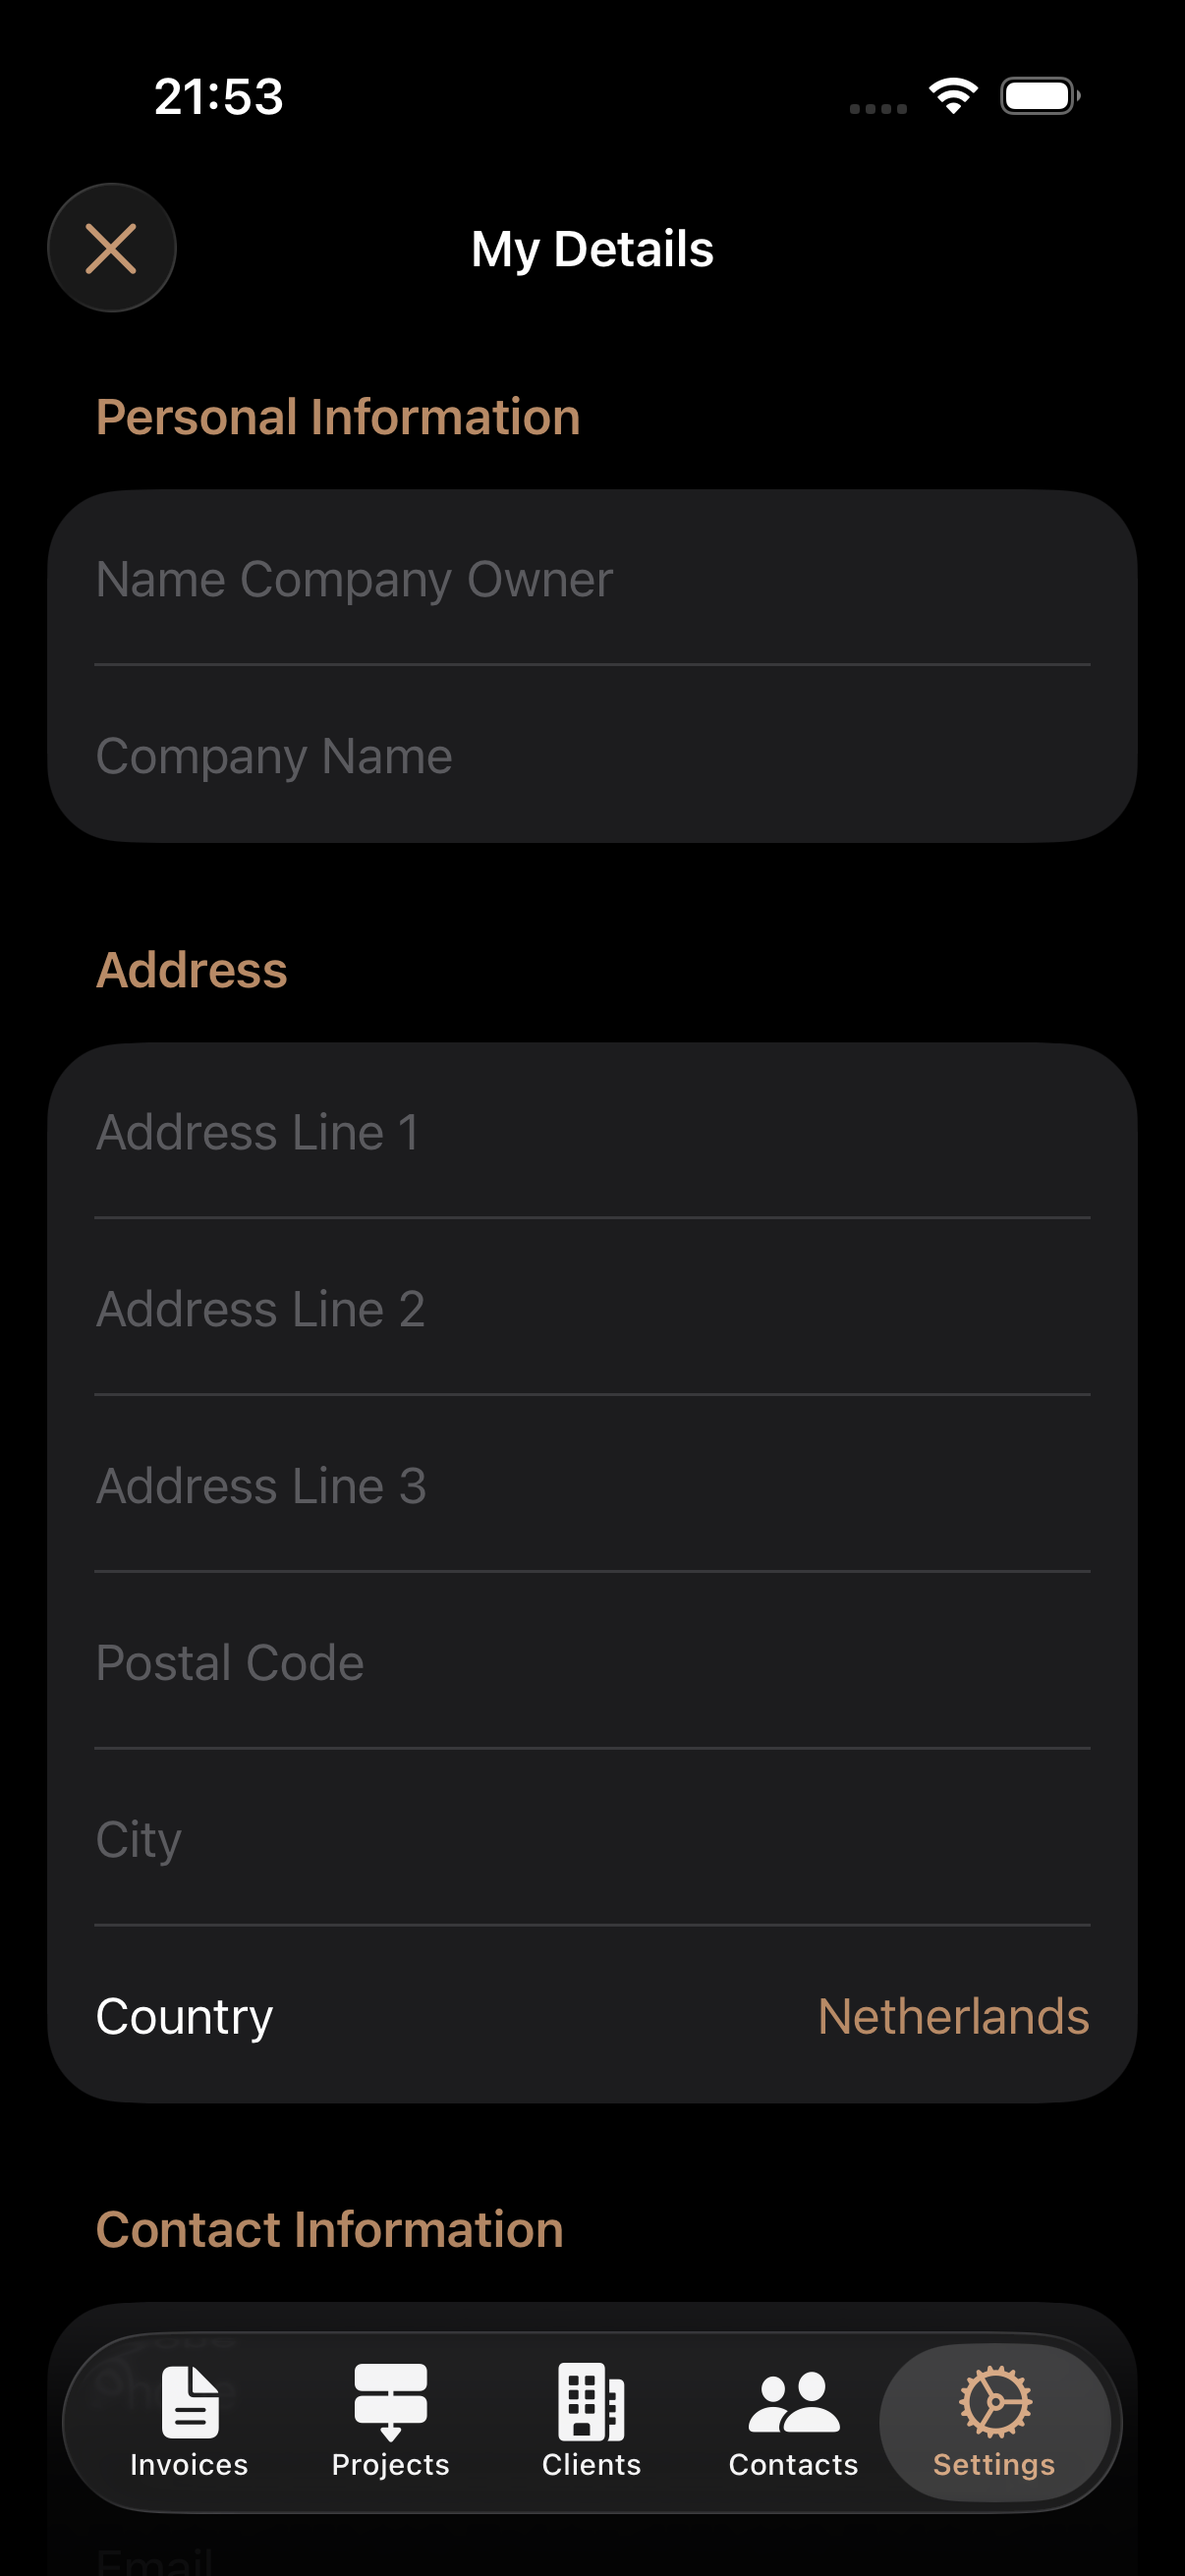
My Details
Navigation Path: Main App > Settings > Company Details > My Details
Purpose: Enter your personal and company information that will appear on generated invoices and timesheets. This is the identity of your consultancy business within the app.
Fields & Controls
Personal Information
| Field | Type | Description | Constraints |
|---|---|---|---|
| Name Company Owner | Text field | Your full name as the business owner. | Required |
| Company Name | Text field | Your registered company or trading name. | Required |
Address
| Field | Type | Description | Constraints |
|---|---|---|---|
| Address Line 1 | Text field | Primary street address. | Required |
| Address Line 2 | Text field | Additional address information (suite, floor, etc.). | Optional |
| Address Line 3 | Text field | Further address details if needed. | Optional |
| Postal Code | Text field | Postal or ZIP code. | Required |
| City | Text field | City or town name. | Required |
| Country | Button / Picker | Opens a searchable list of countries. Tap to select your country. | Defaults to your device region |
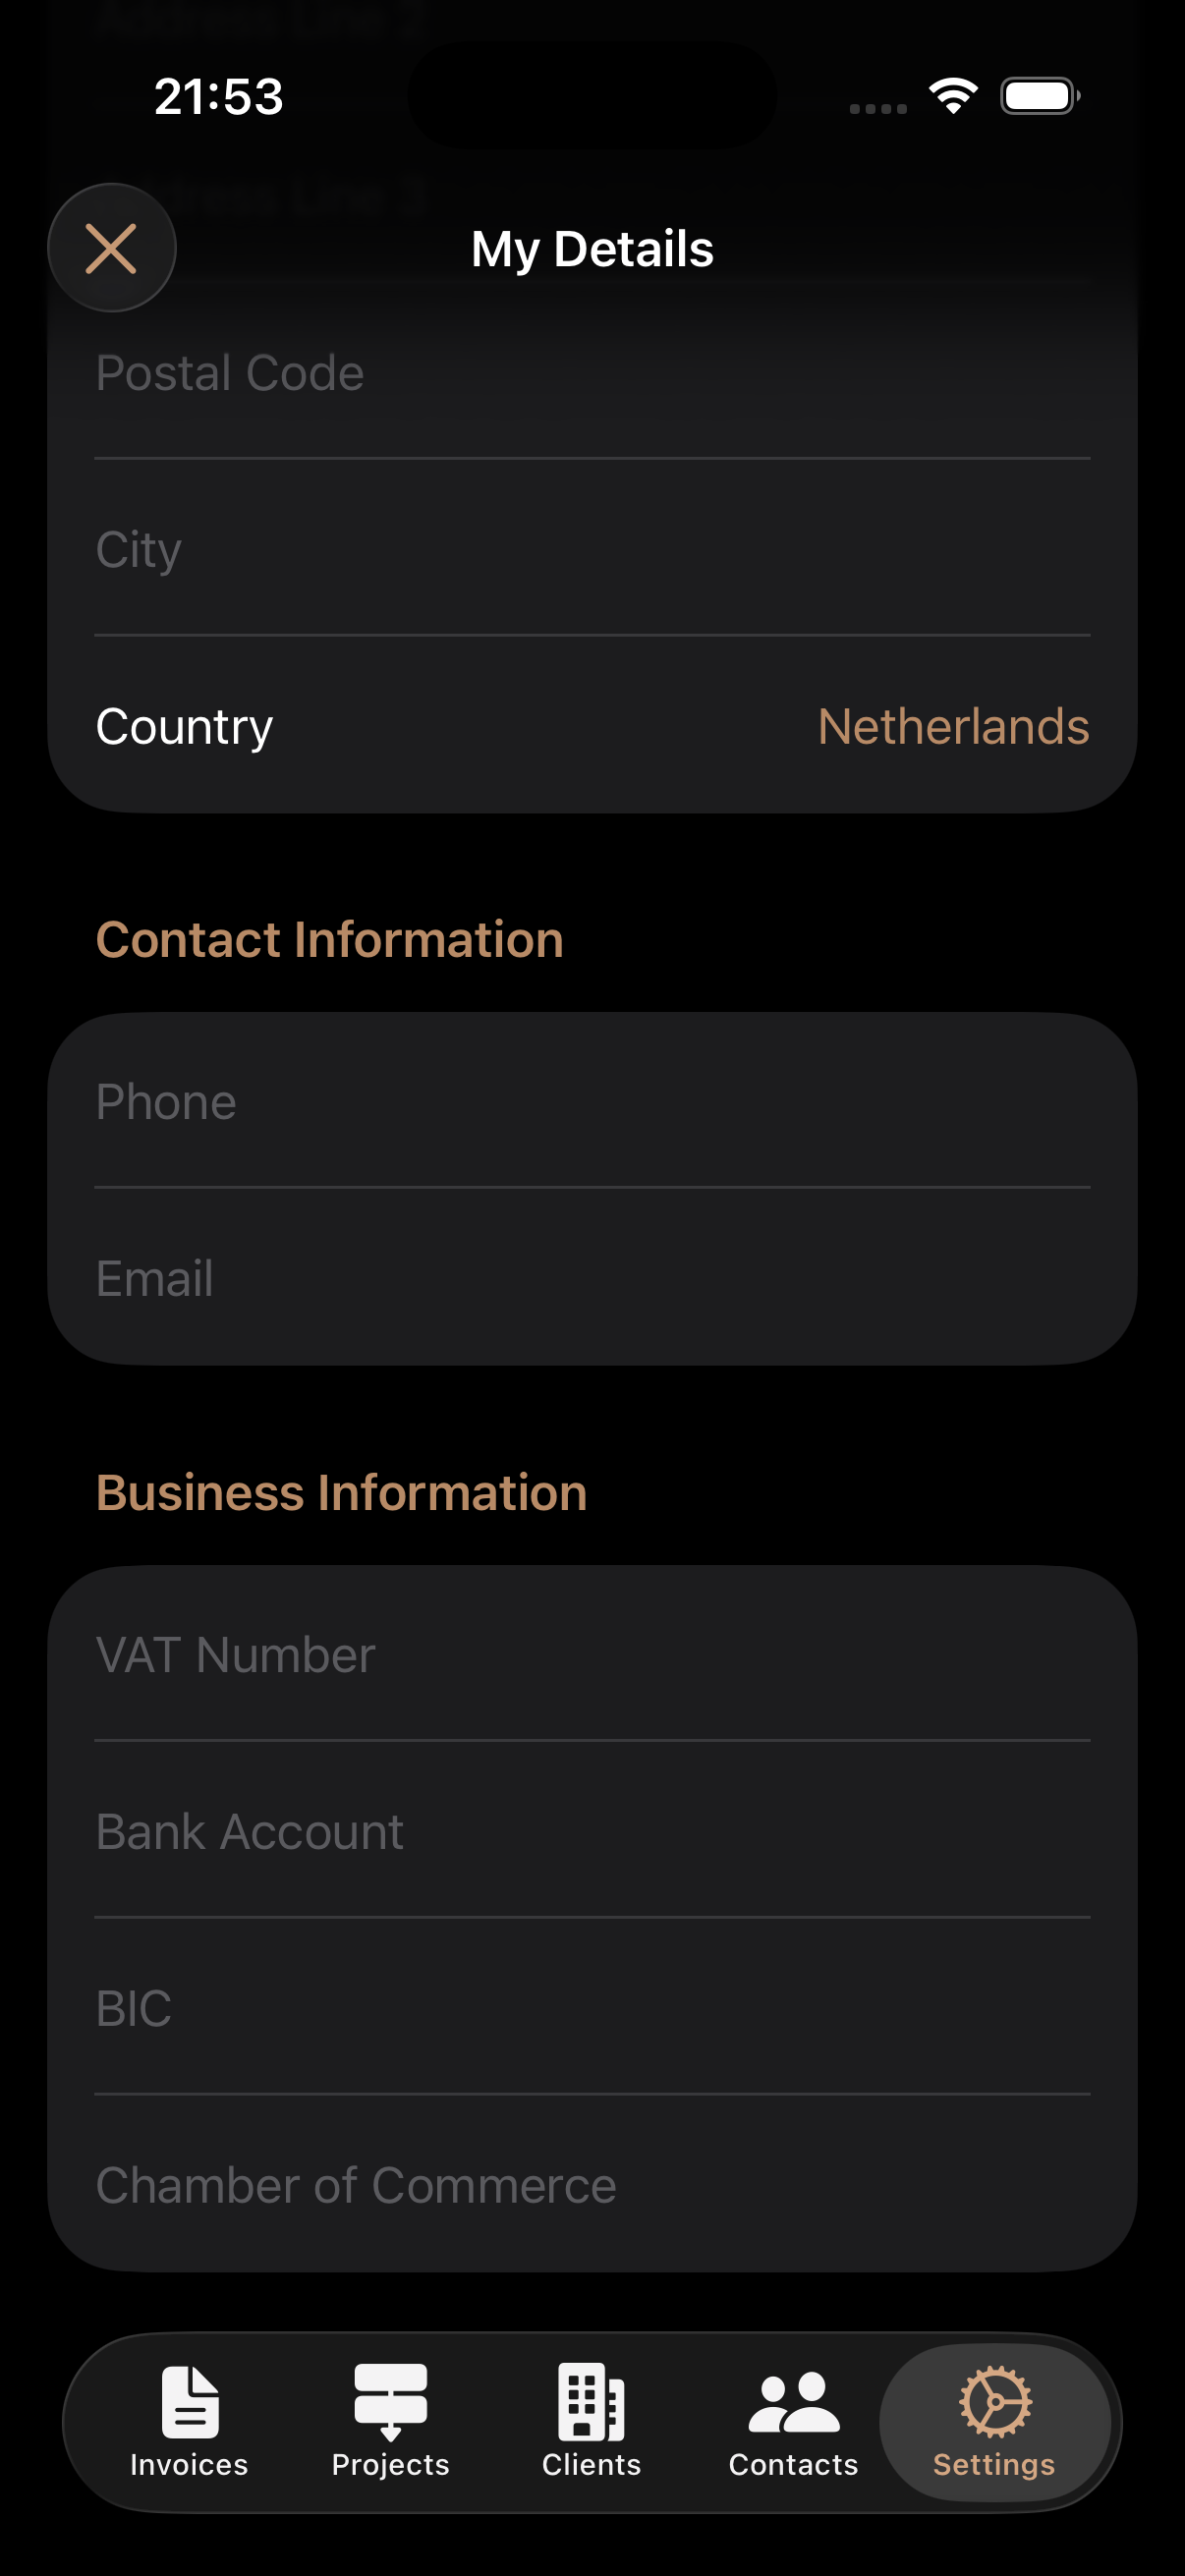
Contact Information
| Field | Type | Description | Constraints |
|---|---|---|---|
| Phone | Text field | Your business phone number. | Required |
| Text field | Your business email address. | Required |
Business Information
| Field | Type | Description | Constraints |
|---|---|---|---|
| VAT Number | Text field | Your VAT registration number (e.g., NL123456789B01). | Optional |
| Bank Account | Text field | Your bank account number (e.g., IBAN). | Optional |
| BIC | Text field | Your bank's BIC/SWIFT code. Automatically displayed in uppercase. | Optional |
| Chamber of Commerce | Text field | Your Chamber of Commerce registration number. | Optional |
How to Use
- Navigate to Settings > Company Details > My Details.
- Fill in all the required fields (marked above).
- To select a country, tap the country button to open the country picker. You can search for your country by name.
- When you have made changes, a Save button appears in the top-right corner.
- Tap Save to store your details.
- To discard your changes, tap the Cancel button. If you have unsaved changes, tapping Cancel will revert to the last saved values. If there are no changes, it will navigate back.
Tips
- All required fields must be filled in before you can save. The Save button only appears when there are valid changes to save.
- Leading and trailing whitespace is automatically trimmed from all fields when saving.
- Your company details are used in the header and footer of generated PDF invoices and timesheets, so make sure they are accurate.
- The keyboard toolbar provides Previous/Next arrows to move between fields quickly, and a Close button to dismiss the keyboard.
- Changes are tracked automatically. The app detects whether you have modified any field compared to the saved version.
Tab Colors
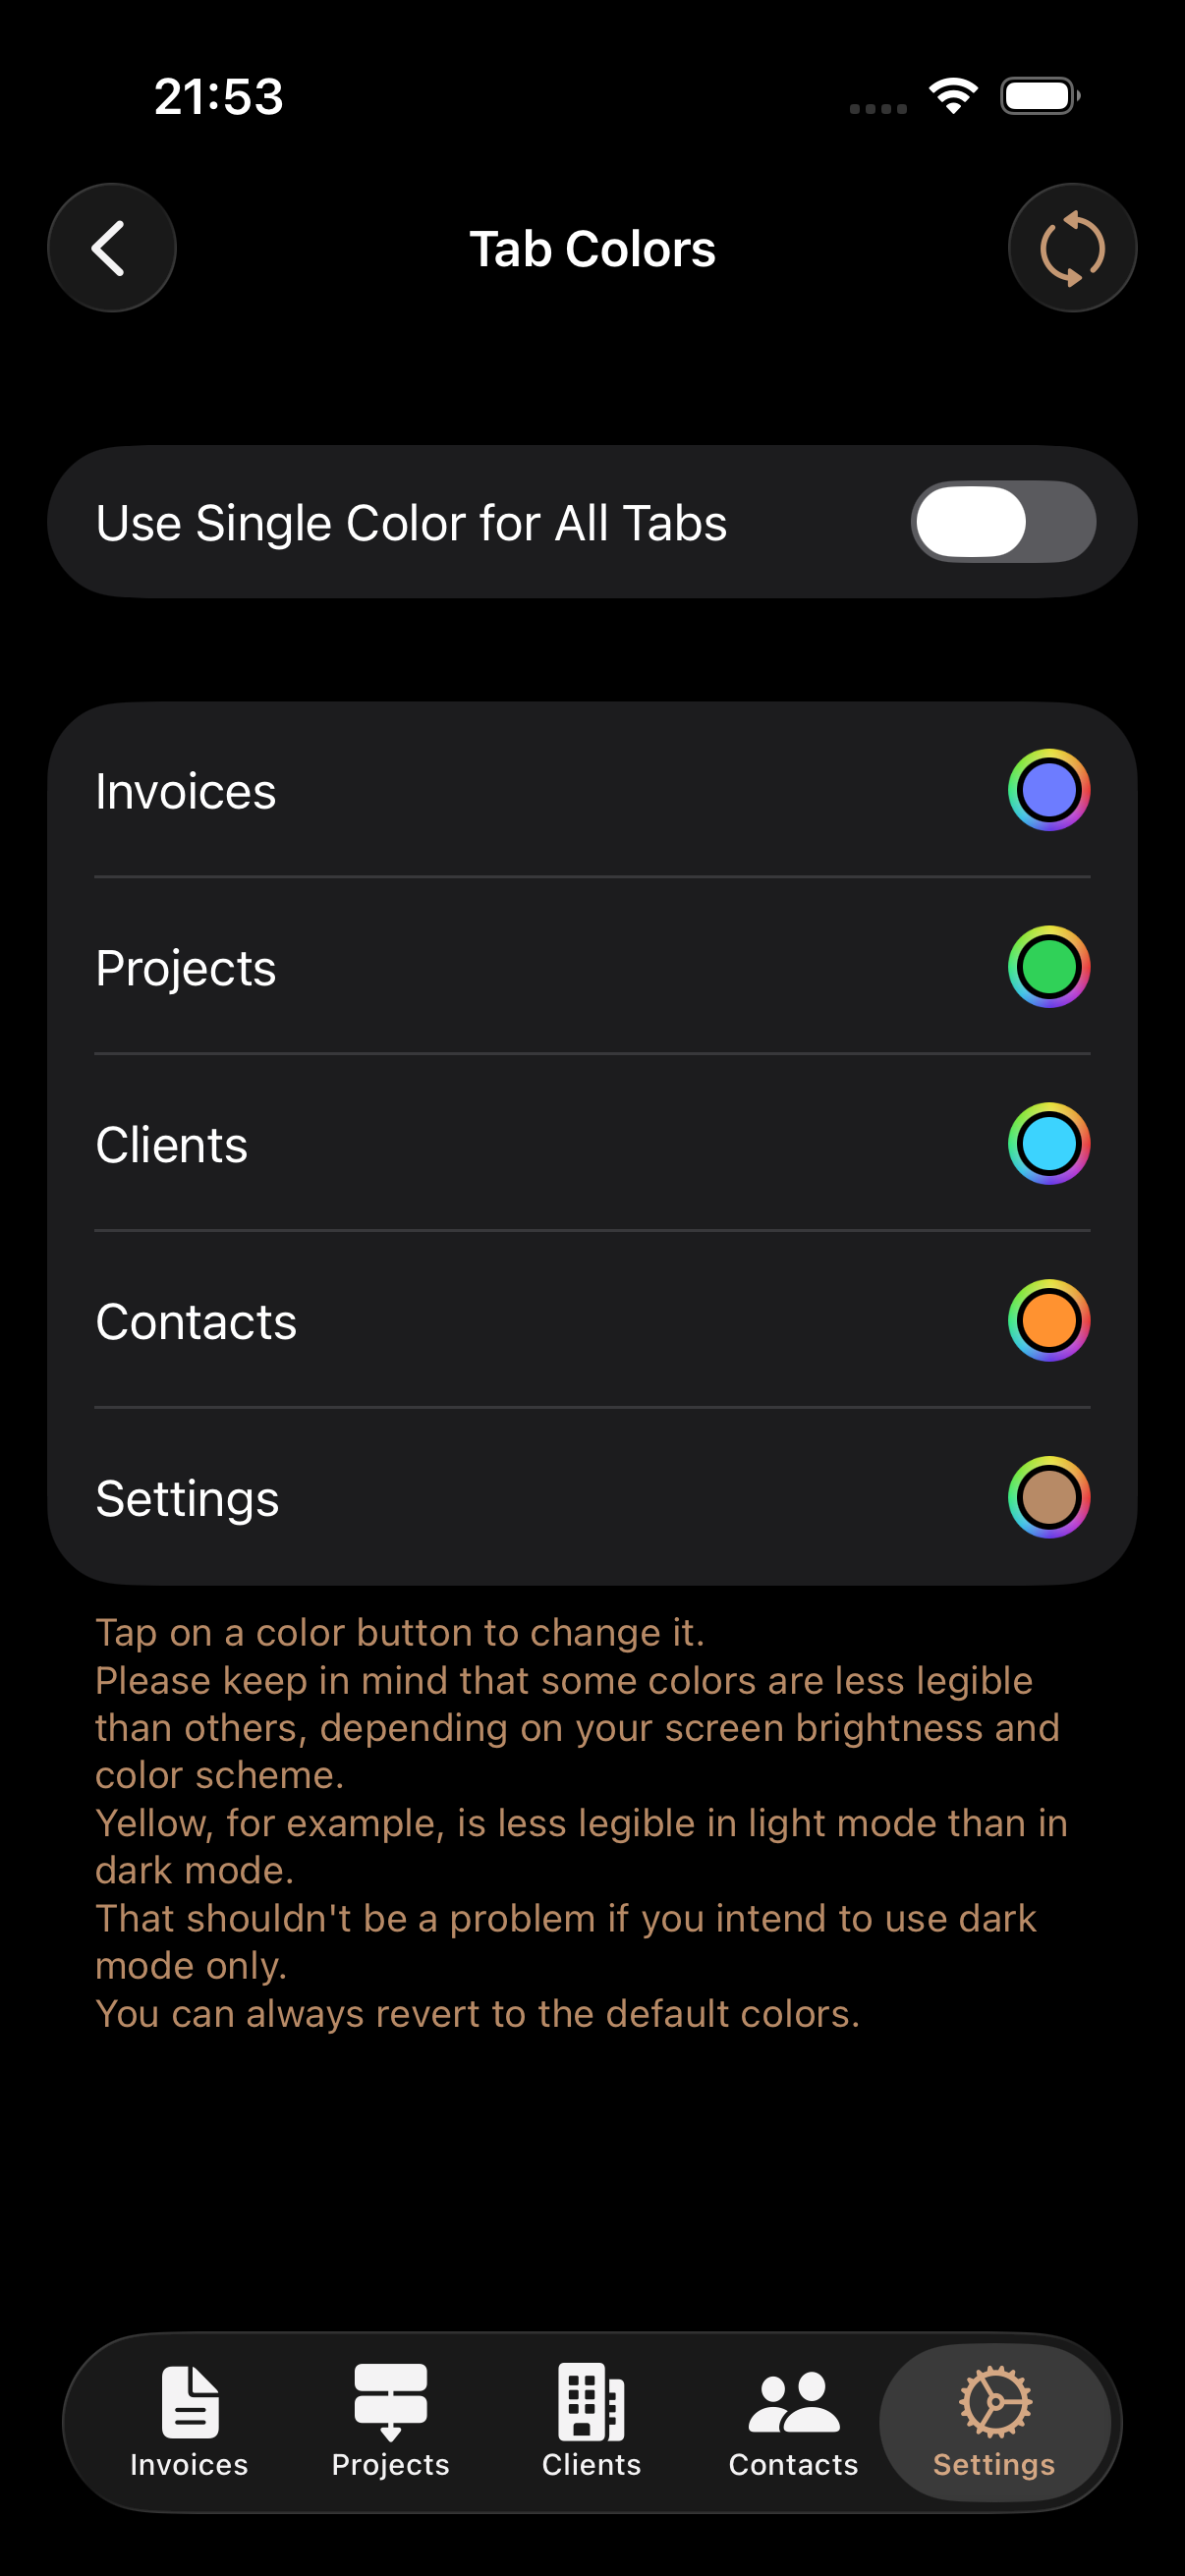
Tab Colors
Navigation Path: Main App > Settings > General > Tab Colors
Purpose: Customize the accent colors used for each tab in the app's navigation bar. You can assign a unique color to each section or use a single color throughout.
Fields & Controls
| Control | Type | Description |
|---|---|---|
| Use Single Color for All Tabs | Toggle | When enabled, a single color is applied to all tabs. When disabled, each tab can have its own color. |
| Single Tab Color | Color picker | Shown when single-color mode is enabled. Tap to choose one color for all tabs. |
| Invoices / Projects / Clients / Contacts / Settings | Individual color pickers | Shown when single-color mode is disabled. Each entity type has its own color picker. |
| Reset (toolbar button) | Button | Resets all tab colors to the built-in defaults and switches back to multi-color mode. |
How to Use
- Tap Tab Colors in the General section of Settings.
- To use one color everywhere, turn on Use Single Color for All Tabs and pick a color.
- To assign different colors to each section, turn off the single-color toggle and tap each entity name to pick its color.
- To restore the original default colors, tap the Reset button in the top-right corner.
- Changes are saved automatically as you pick colors.
Tips
- When choosing custom tab colors, keep readability in mind. Some colors (like yellow) may be hard to read in light mode but work well in dark mode. A note about this is shown on the Tab Colors screen.
- The Reset button returns all colors to their defaults in one tap, which is useful if your custom palette becomes hard to read.
Invoice Number Generator
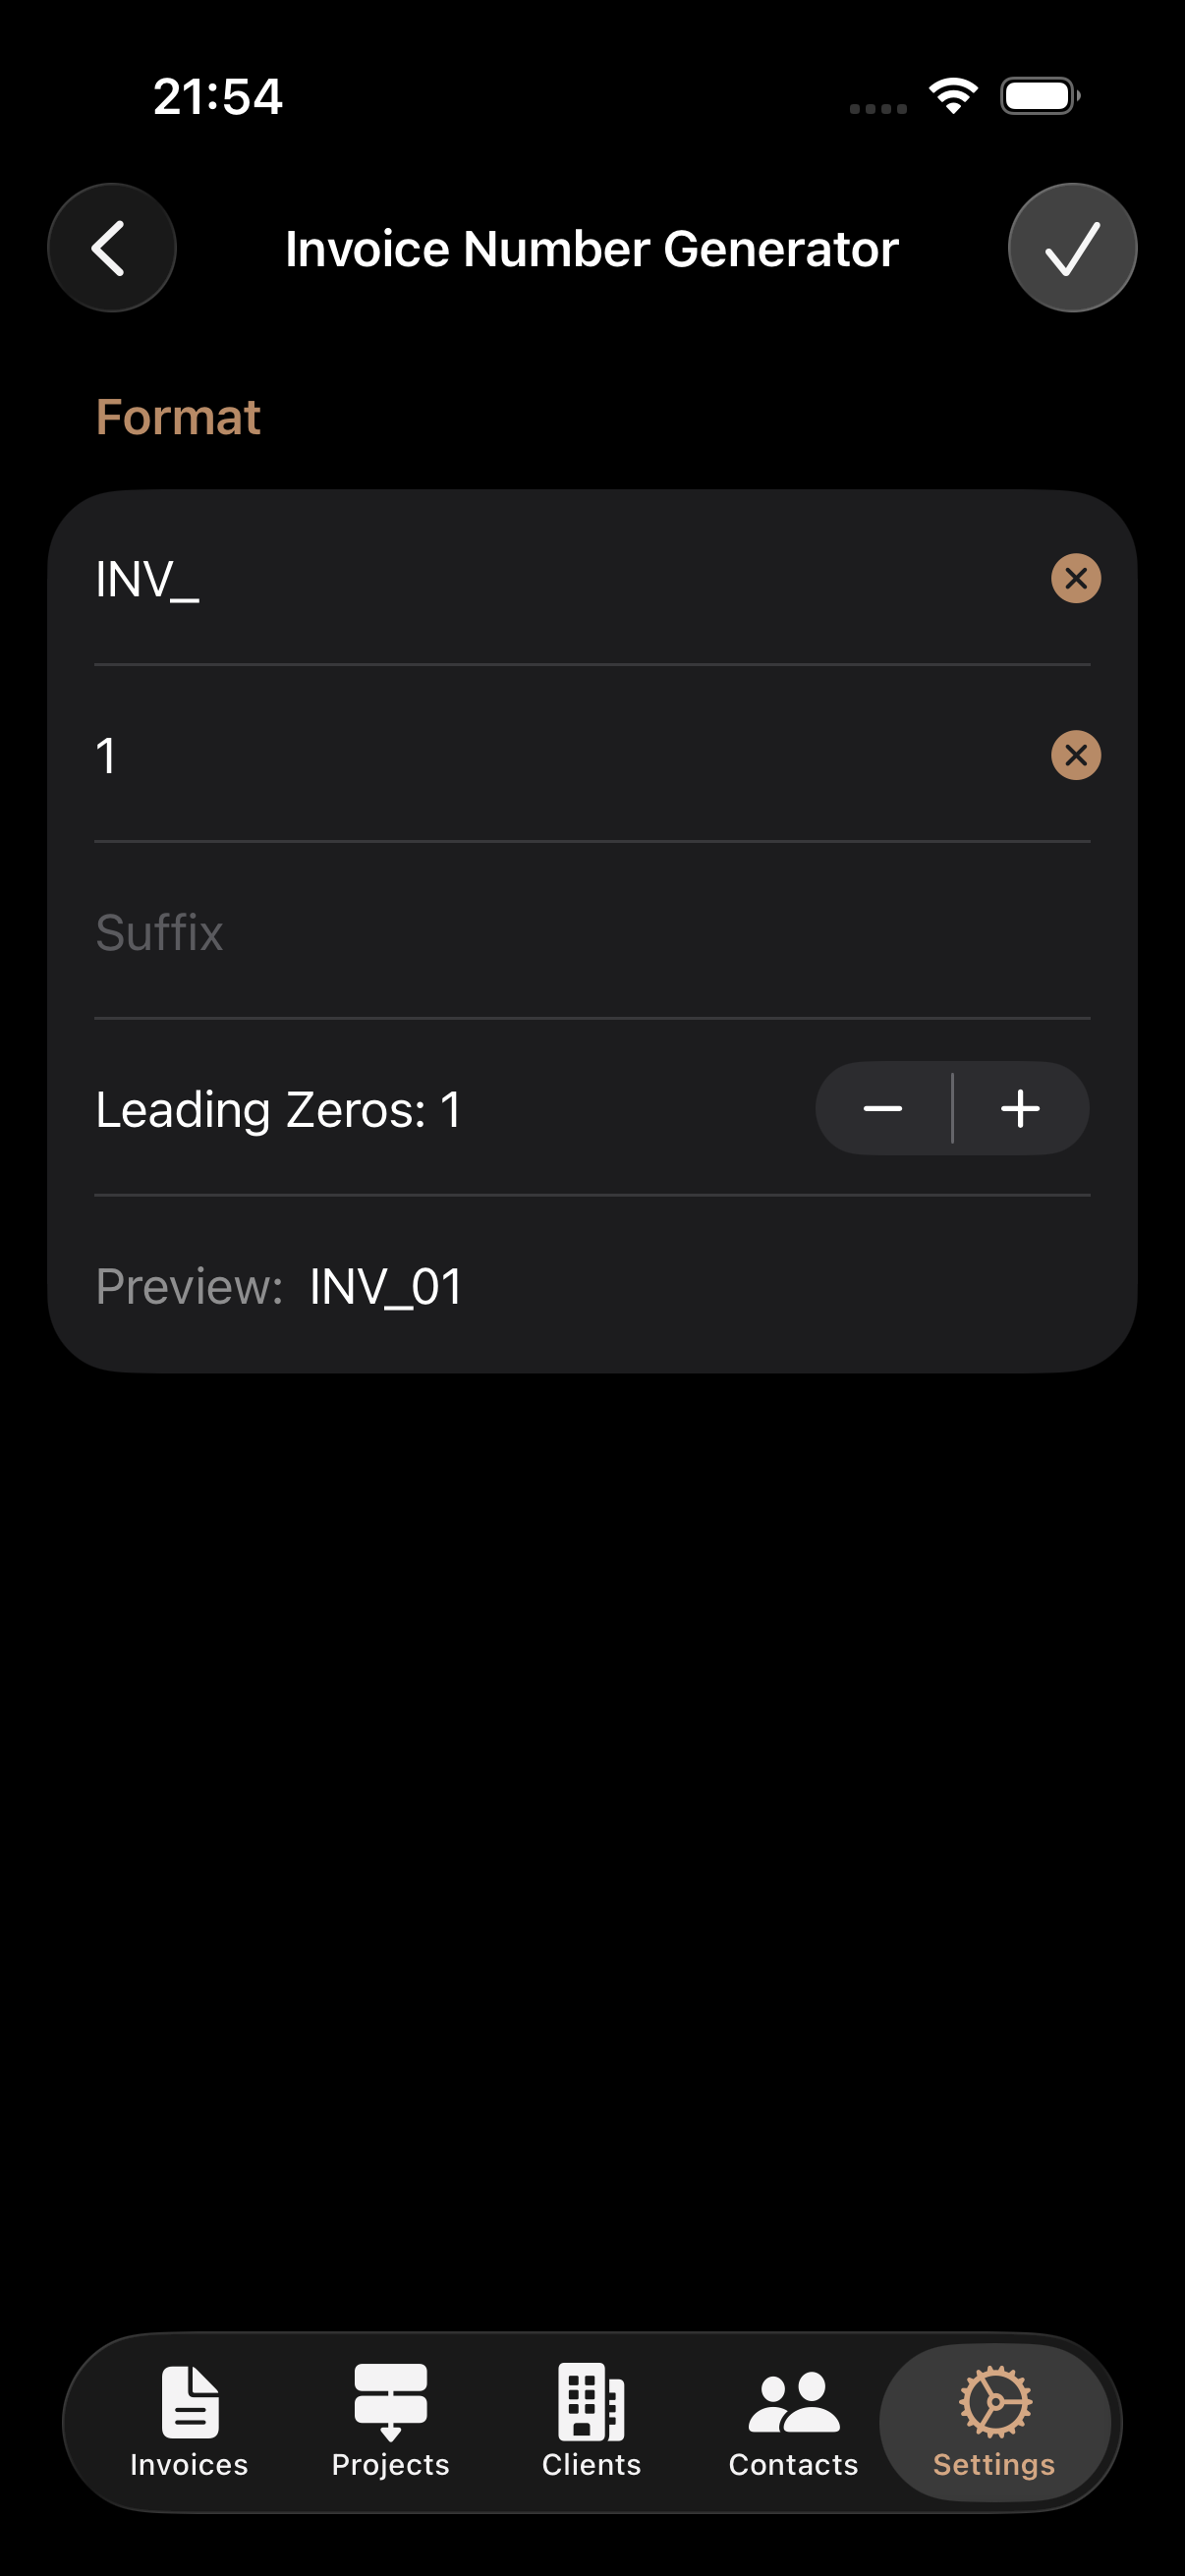
Invoice Number Generator
Navigation Path: Main App > Settings > Invoice Defaults > Invoice Number Generator
Purpose: Configure the automatic numbering format for new invoices. Define a prefix, starting counter, suffix, and the number of leading zeros to create a consistent invoice numbering scheme.
Fields & Controls
| Field | Type | Description | Constraints |
|---|---|---|---|
| Prefix | Text field | A text string placed before the counter number (e.g., "INV-" or "2026-"). | Optional; autocapitalization disabled |
| Counter | Text field (numeric) | The current counter value. This number increments automatically each time a new invoice is created. | Numeric only; required |
| Suffix | Text field | A text string placed after the counter number (e.g., "-A" or "/NL"). | Optional; autocapitalization disabled |
| Leading Zeros | Stepper | Controls how many leading zeros pad the counter number. A value of 1 means the minimum number width is 2 digits; a value of 3 means minimum 4 digits. | Range: 0 to 5 |
| Preview | Display | Shows a live preview of the generated invoice number using the current prefix, counter, suffix, and leading zeros. | Read-only |
How to Use
- Navigate to Settings > Invoice Defaults > Invoice Number Generator.
- Enter a Prefix if you want text before the number (e.g., "INV-" or "2026-").
- Set the Counter to the number you want to start from (or adjust to the next number in your sequence).
- Enter a Suffix if you want text after the number.
- Use the Leading Zeros stepper to control number padding. For example, with leading zeros set to 3, counter 5 becomes "0005".
- Check the Preview line to verify the format looks correct.
- Tap the Save button in the top-right corner to apply your changes.
- The Save button is only enabled when you have made changes.
Examples
| Prefix | Counter | Suffix | Leading Zeros | Result |
|---|---|---|---|---|
| INV- | 1 | 3 | INV-0001 | |
| 2026- | 42 | 2 | 2026-042 | |
| 100 | -NL | 0 | 100-NL | |
| CI/ | 7 | /A | 4 | CI/00007/A |
Tips
- The counter automatically increments each time you create a new invoice. You only need to set it once, or adjust it if you need to skip numbers.
- The leading zeros value determines the minimum width of the counter. For example, a leading zeros value of 3 means the counter will always be at least 4 digits (value + 1).
- Whitespace is automatically trimmed from the prefix and suffix when saving.
- The preview updates in real time as you type, so you can see exactly how your invoice numbers will look before saving.
- A helpful description appears at the bottom of the screen indicating which field is currently focused.
Non-Working Days
Non-Working Days
Navigation Path: Main App > Settings > Invoice Defaults > Non-Working Days
Purpose: Manage your calendar of non-working days such as public holidays, vacation days, and other days off. These days are used when generating timesheets to automatically exclude non-working periods.
Fields & Controls
Non-Working Days List Screen
| Control | Type | Description |
|---|---|---|
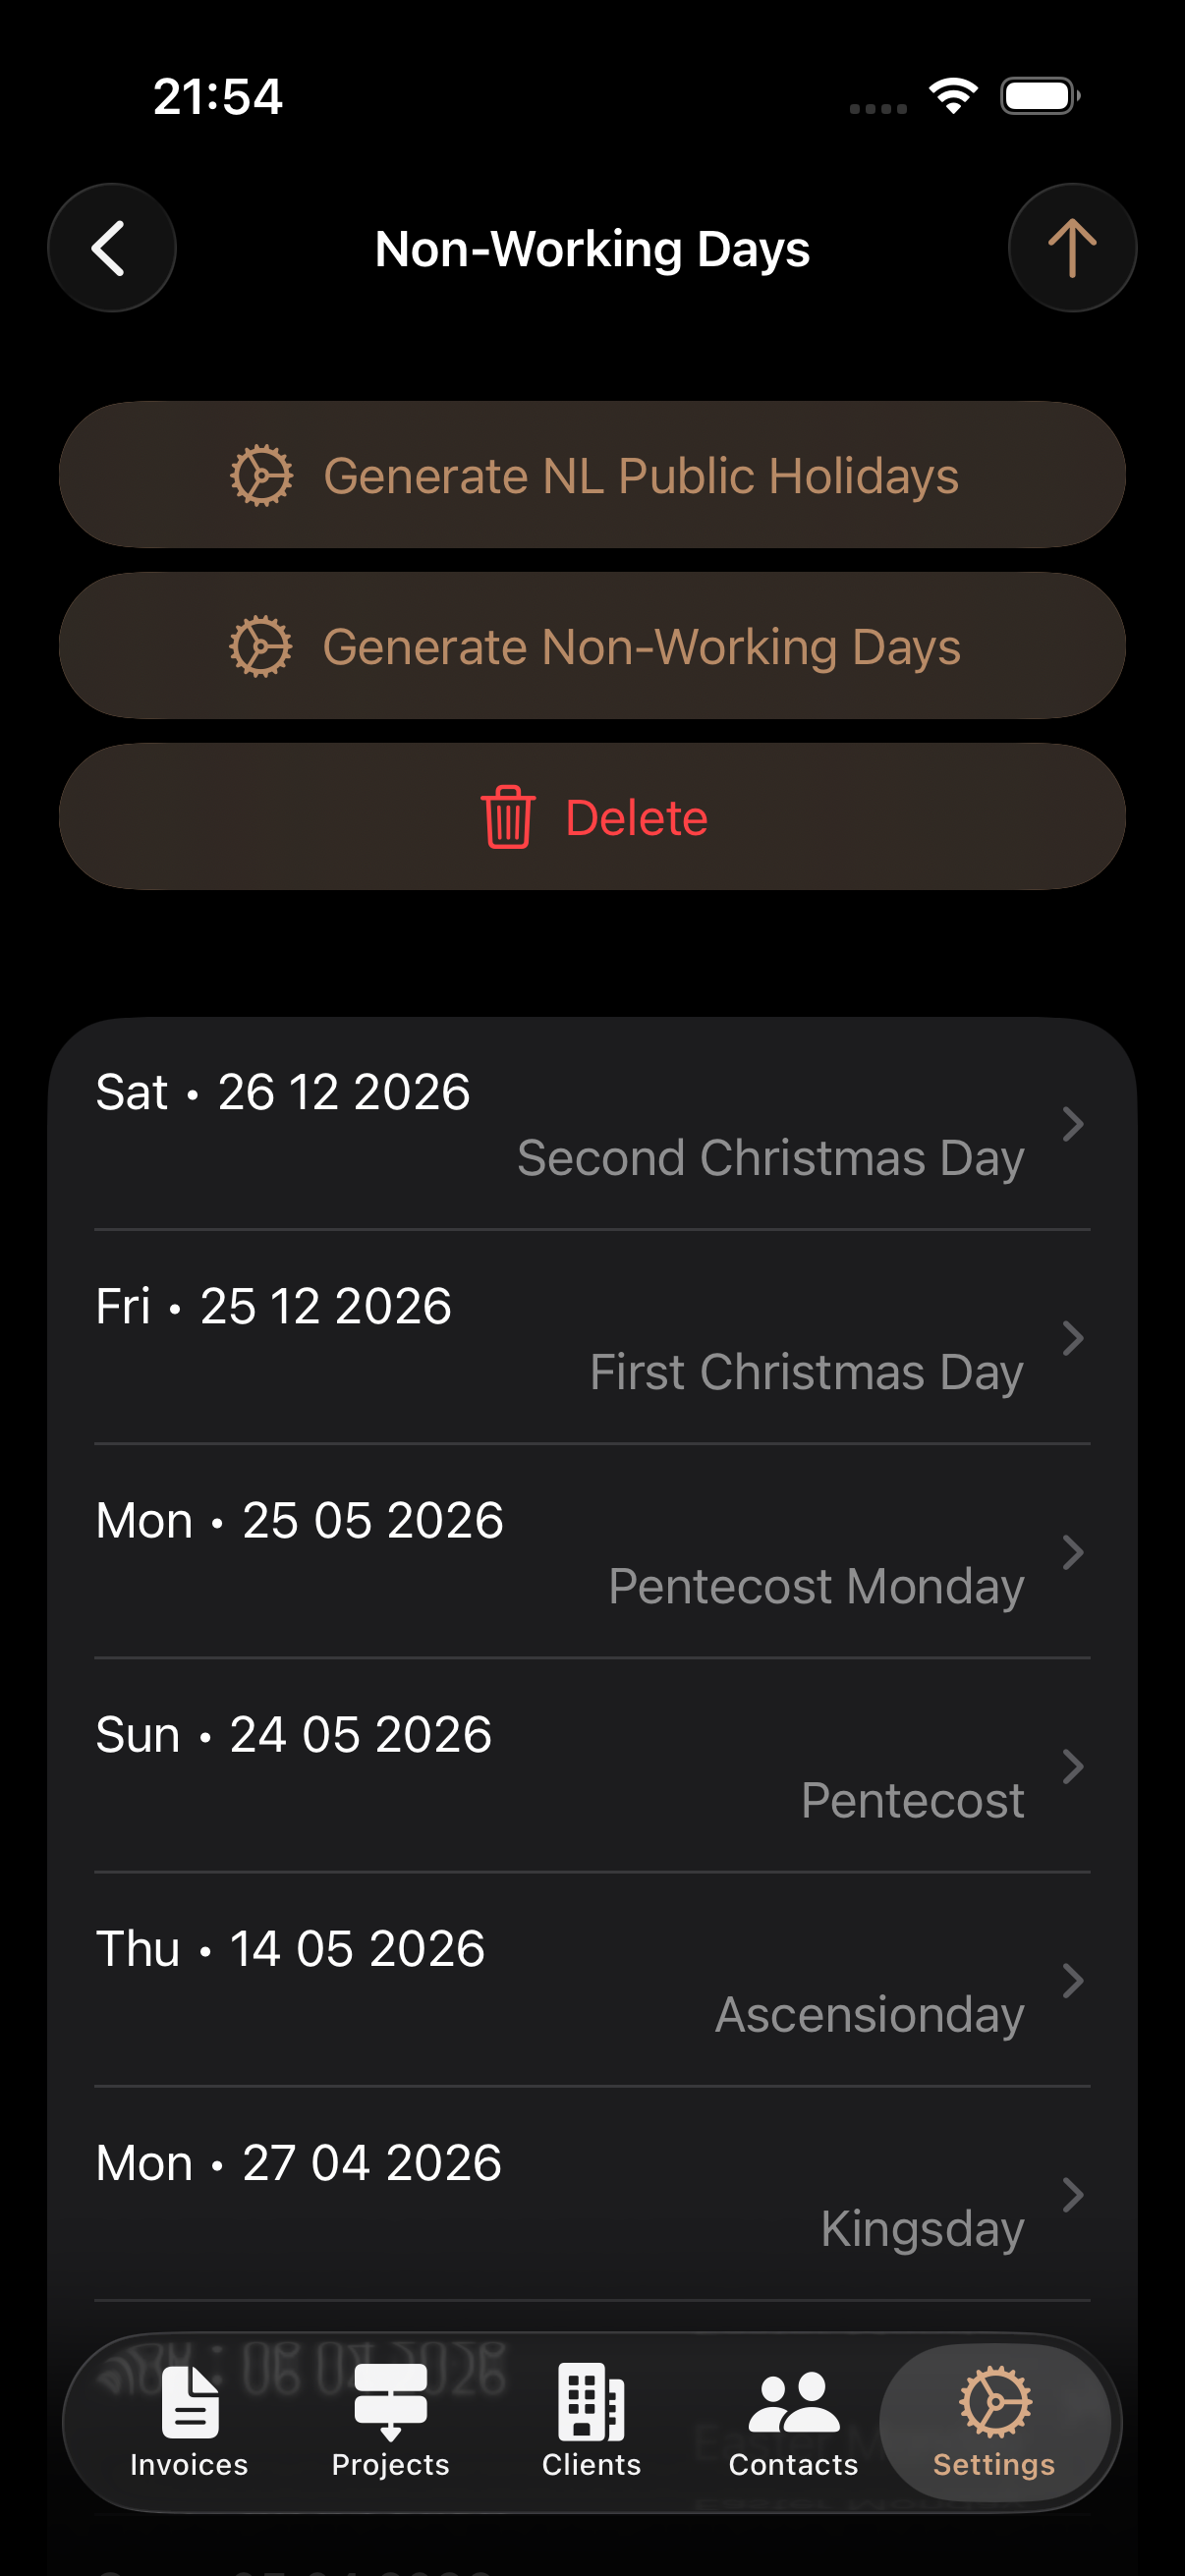
| Generate NL Public Holidays | Button | Opens a year picker to automatically generate all Dutch public holidays for a selected year. |
| Generate Non-Working Days | Button | Opens the custom generation screen where you can create non-working days for a date range with specific weekday selections. |
| Delete | Button | Opens a dialog to delete non-working days. You can delete all days or filter by year. Only visible when non-working days exist. |
| Sort (toolbar) | Button | Toggles the list sort order between ascending and descending by date. Only visible when non-working days exist. |
| Non-working day list | List | Displays all non-working days showing the date (with weekday) and description. Tap an entry to edit it. Swipe left to delete individual entries. |
Generate Non-Working Days Screen
| Control | Type | Description |
|---|---|---|
| Period selector | Segmented picker | Choose between Date (single day), Week, Month, or Range. |
| Weekday toggles | Day selector | Select which weekdays to include (Monday through Friday are selected by default). |
| Start Date / End Date | Date pickers | Define the date range for generation. Behavior varies by period type. |
| Description | Text field | A description applied to all generated non-working days (e.g., "Vacation", "Office Closed"). Required. |
| Generate | Button | Creates non-working day entries for all selected weekdays within the chosen date range. Disabled until both weekdays and a description are provided. |
Non-Working Day Details Screen
| Field | Type | Description | Constraints |
|---|---|---|---|
| Date | Date picker | The date of the non-working day. | Required |
| Description | Text field | A description of why this day is non-working (e.g., "Christmas Day"). | Required |
Dutch Public Holidays Generated
The "Generate NL Public Holidays" feature creates the following holidays for the selected year:
- New Year's Day (January 1)
- Good Friday (2 days before Easter)
- Easter Sunday and Easter Monday
- King's Day (April 27, or April 26 if the 27th falls on a Sunday)
- Liberation Day (May 5, only in years divisible by 5)
- Ascension Day (39 days after Easter)
- Pentecost Sunday and Pentecost Monday
- First and Second Christmas Day (December 25-26)
How to Use
Generating Dutch Public Holidays
- Tap Generate NL Public Holidays.
- A year picker appears with a range of years around the current year.
- Select the desired year and tap Generate.
- All Dutch public holidays for that year are created automatically.
Generating Custom Non-Working Days
- Tap Generate Non-Working Days.
- Select a period type: Date (single day), Week, Month, or Range.
- Select which weekdays to include using the day toggles.
- Adjust the start and end dates as needed.
- Enter a Description (e.g., "Summer Holiday").
- Tap Generate to create the entries.
- The description field clears after successful generation, ready for the next batch.
Editing a Non-Working Day
- Tap any non-working day in the list to open its details.
- Modify the Date or Description as needed.
- Tap Save to apply changes.
Deleting Non-Working Days
- Individual: Swipe left on any entry in the list and tap Delete.
- Bulk: Tap the Delete button above the list, then choose to delete all days or only days for a specific year.
- A confirmation dialog always appears before deletion.
Tips
- The sort button in the toolbar toggles between newest-first and oldest-first ordering.
- When generating by week, the start and end dates automatically adjust to Monday and Sunday of the selected week.
- When generating by month, the dates automatically span the entire selected month.
- Non-working days are used by the timesheet feature to identify and exclude days when no work should be recorded.
- You can generate Dutch public holidays for multiple years by repeating the process for each year.
- The Generate button is disabled until you have both selected at least one weekday and entered a description, as indicated by the message prompts below the list.
Coming soon
Coming soon
Coming soon
Coming soon
Features
Professional Invoices
Create polished invoices with your logo, company details, and customizable templates.
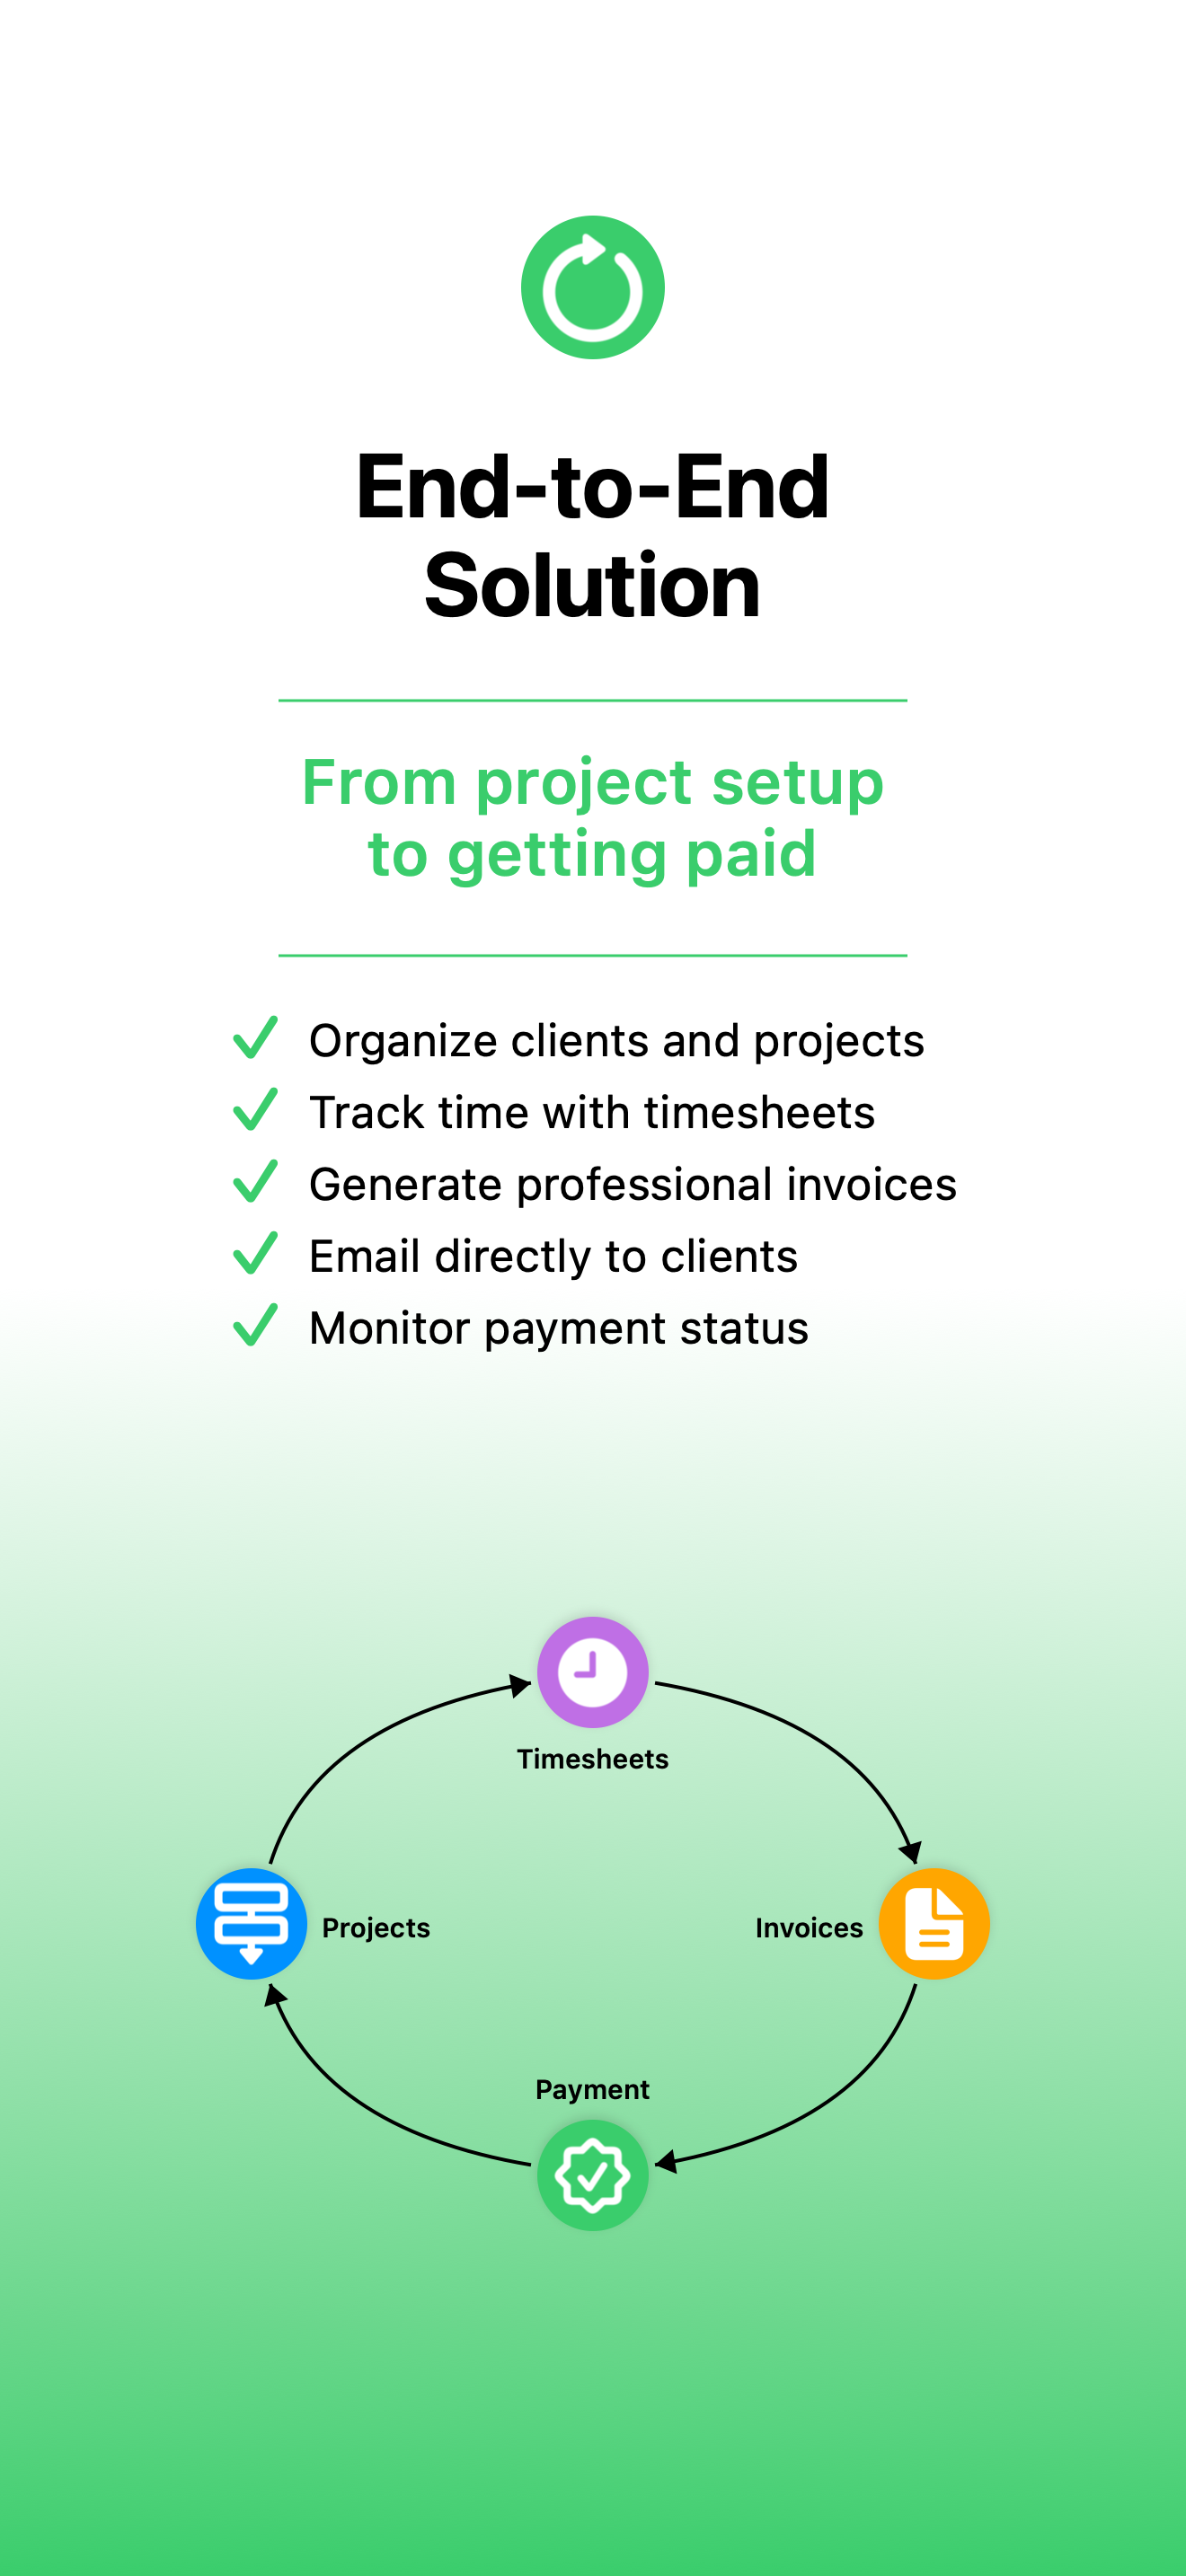
Client Management
Keep all your client information organized and accessible in one place.
Time Tracking
Track billable hours and automatically convert them into invoice line items.
Multi-Currency
Invoice in any currency.
PDF Export & Share
Generate professional PDF invoices and share them via email, messaging, or AirDrop.
Secure & Private
Your data stays on your device, secured with PIN and biometric authentication. Only shared amongst your iOS devices via iCloud.
Feature Requests
Sign in to participate
Sign In